
Infinity Battle Report: Much Ado About Nothing
Today we have a special guest battle report from Jon (ITS WiseKensai), one of my good friends and more frequent opponents. Since we are running the Rose City Raid and not participating in it, I felt it was only fair that we put ourselves through what our players will face. This was also a veiled excuse to have someone over to drink beer with and roll dice.
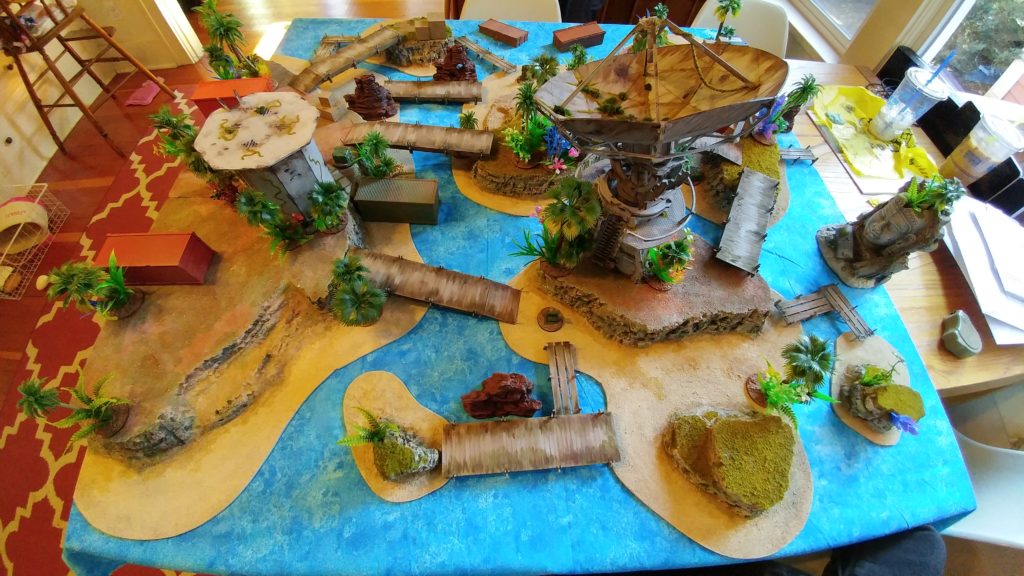
Adam and I had a free Saturday afternoon, so after a tasty lunch with our better halves and offspring, we got a chance to play on Adam’s beautiful islands table. It’s the very same one that gave Obi and I such trouble at our last tournament, so Adam and I spent a fair amount of time trying to get a reasonably fair set of deployment zones and approach vectors to the other side of the table. Both of us wanted more practice at Looting and Sabotaging because it’s a difficult mission, and of course we wanted two things to be difficult–the mission and the table.

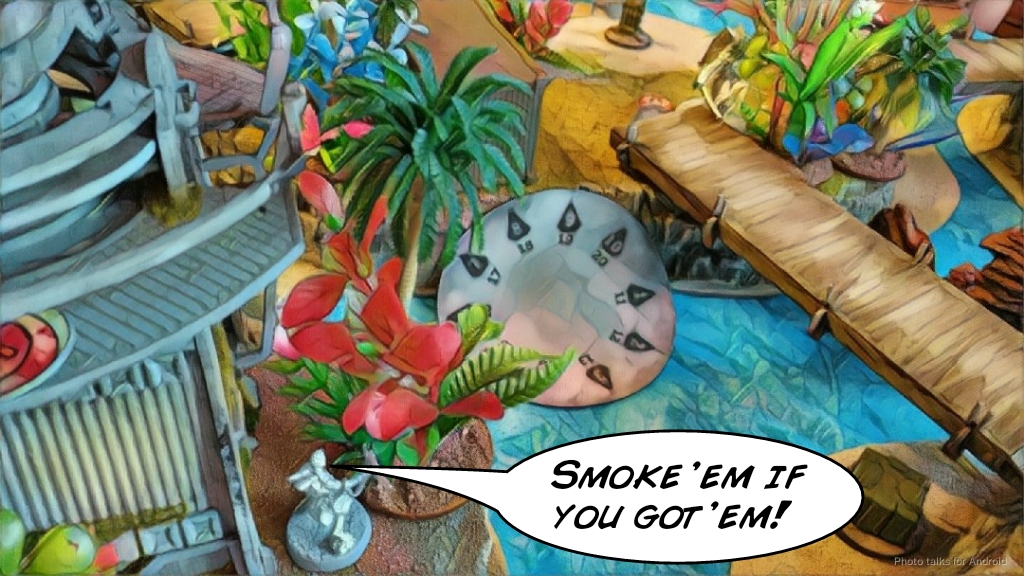
Adam’s deployment zone had plenty of cover, although not much mobility out of the center. He had crazy good lines of fire to the AC2 from just about everywhere, practically demanding that I have smoke.On my side of things, I had decent lines of fire to the AC2, many of them much shorter than Adam’s. I also had a very elevated vantage point, thanks to the big satellite dish. I figured I could get a Djanbazan up there, faced backwards to cover my entire deployment zone to protect my AC2 from Yuan Yuans.

As for getting between the deployment zones, well… that was going to suck. Either swim thorough the oceans or walk along all of the boardwalks/bridges between the islands (pretty circuitous). I hoped that I would be able to just made a mad dash in with my Fiday and friends to get the job done, but this table was going to be a nightmare to get enough assets in place to kill destroy the AC2.
Overview
- Mission: Looting and Sabotaging
- Forces: Haqqislam versus Ikari Company (300)
- Deploy First: Haqqislam
- First Turn: Haqqislam
Looting and Sabotage
GROUP 1 | 10 1
NAFFATÛN Lieutenant Rifle + Light Flamethrower, Grenades / Pistol, Knife. (0 | 12)
DJANBAZAN HMG / Pistol, Knife. (1.5 | 35)
DJANBAZAN Shock Marksman Rifle / Pistol, Knife. (0 | 29)FASID HMG + (Smoke and Normal) Light Grenade Launcher, Antipersonnel Mines / Heavy Pistol, Knife. (2 | 53)
HAWWA’ Hacker (Assault Hacking Device) Boarding Shotgun, D-Charges / Pistol, Knife. (0.5 | 26)
FIDAY Rifle + Light Shotgun, Smoke Grenades / Pistol, DA CCW, Knife. (0 | 31)
KRAKOT RENEGADE 2 Chain Rifles, Grenades / Pistol, DA CC Weapon. (0 | 14)
HASSASSIN HUSAM YASBIR (Infiltration, Holoprojector L2) Rifle + Light Shotgun, Nanopulser, Smoke Grenades / Pistol, Viral CCW, Knife. (0 | 34)
HAFZA Heavy Rocket Launcher / Assault Pistol, Knife. (1.5 | 18)
TUAREG Doctor Plus (MediKit) Rifle + Light Shotgun, Antipersonnel Mines / Pistol, Knife. (0 | 33)GROUP 2 | 3 3
MUTTAWI’AH Chain Rifle, E/Marat, Jammer, Smoke Grenades / Pistol, Knife. (0 | 5)
MUTTAWI’AH Chain Rifle, E/Marat, Jammer, Smoke Grenades / Pistol, Knife. (0 | 5)
MUTTAWI’AH Chain Rifle, E/Marat, Jammer, Smoke Grenades / Pistol, Knife. (0 | 5)5.5 SWC | 300 Points | Open in Infinity Army
Adam's List:
Ikari Company
GROUP 1 | 8 2 3
DAIYŌKAI MULTI Marksman Rifle, Panzerfaust / Pistol, DA CC Weapon, AP CC Weapon. (0 | 52)
YUAN YUAN Chain Rifle, Smoke Grenades / Pistol, DA CCW. (0 | 9)
YUAN YUAN Chain Rifle, Smoke Grenades / Pistol, DA CCW. (0 | 9)KEISOTSU (Forward Observer) Combi Rifle / Pistol, Knife. (0 | 10)
KEISOTSU (Forward Observer) Combi Rifle / Pistol, Knife. (0 | 10)
KEISOTSU Missile Launcher / Pistol, Knife. (1.5 | 14)
TANKŌ Missile Launcher / Pistol, Monofilament CC Weapon, Shock CC Weapon. (1.5 | 32)
BRAWLER Hacker (Assault Hacking Device) Submachine Gun / Pistol, Knife. (0.5 | 17)RUI SHI Spitfire / Electric Pulse. (1.5 | 20)
NINJA Hacker (Killer Hacking Device) Tactical Bow / Pistol, DA CCW, Knife. (0 | 29)GROUP 2 | 5 1 1
YUAN YUAN Chain Rifle, Smoke Grenades / Pistol, DA CCW. (0 | 9)
BRAWLER Lieutenant Rifle + Light Shotgun / Pistol, Knife. (0 | 16)
PANGGULING Hacker (EVO Hacking Device) Electric Pulse. (0.5 | 25)
BRAWLER Doctor (MediKit) Rifle + Light Shotgun / Pistol, Knife. (0 | 20)
YÁOZĂO Electric Pulse. (0 | 3)
PATHFINDER DRONBOT Combi Rifle, Sniffer / Electric Pulse. (0 | 16)
FUGAZI DRONBOT Flash Pulse, Sniffer / Electric Pulse. (0 | 8)5.5 SWC | 299 Points | Open in Infinity Army
Deployment
I won the rolloff and really wanted to go first to leverage my Fiday. I didn’t really have an amazing gameplan for getting guys into base to base with the AC2 on the first turn. In fact, looking at the table and thinking about order expenditure given the extra movement I would need no matter what path I took, I don’t think I could’ve safely gotten anyone into base to base with the AC2 and had the orders to deal with it on the first turn. Certainly I wouldn’t have been able to get multiple guys into base to base with the AC2. Lately I’ve been trying to deploy my units visualizing 2-3 orders ahead in movement so I don’t deploy myself into a corner, so to speak. With this table, you need to see 5-7 moves ahead! It is not for the faint hearted. In any case, I decided that the big satellite dish would be an excellent elevated position for me to cover the entire backfield with a Djanbazan, so I put my marksman rifle Djanbazan just on the lip of the island’s mesa, just inside my deployment zone. The Al Fasid’s base was too big so he had to go at the bottom of the cliff, but his mine got to deploy watching the AC2.

Yasbir hung out in the middle, ready to provide midfield smoke and to back up my Fiday if the way to the AC2 was clear on turn one. The Taureg went down as a TO camo token right next to the right panoply, figuring I’d need the order on my first turn, and the Al’Hawwa was on the left, at the base of the other large building. I put my Djanbazan HMG on the left, figuring I could push the flank if need be, and my Hafza HRL masqueraded as Leila, watching the AC2 as well as the back board edge for any Yuan Yuan shenanigans. My Naffatun lieutenant was only a move away from the AC2, ready to defend it by going into suppression or something later.

As I’m looking at the picture while I write this battle report, it looks like my mine is a little outside of my deployment zone, using the AC2 as a landmark. Ah well. It’s not like it would significantly change much given the local geometry. I put two Mutts on the right and one on the left, with the Krakot all the way up on the boardwalk on the right, figuring that would be the easiest way to get him up the table safely, using Mutt-supplied smoke. This table really encourages you to avoid the water if you don’t have the requisite movement skills.
Adam piled his link team on his right, spreading out the Tanko and Keisotsu missile launchers to make it tough for me to gank them both on turn 1. He put his Yaozao bot close to the link team, with the Brawler doctor in the middle of his DZ and the Brawler lieutenant slightly to the left of center, his perspective. He covered his left flank and my Krakot with a Rui Shi, then stuck a Fugazi and EVO down behind the Rui Shi to watch their backs.

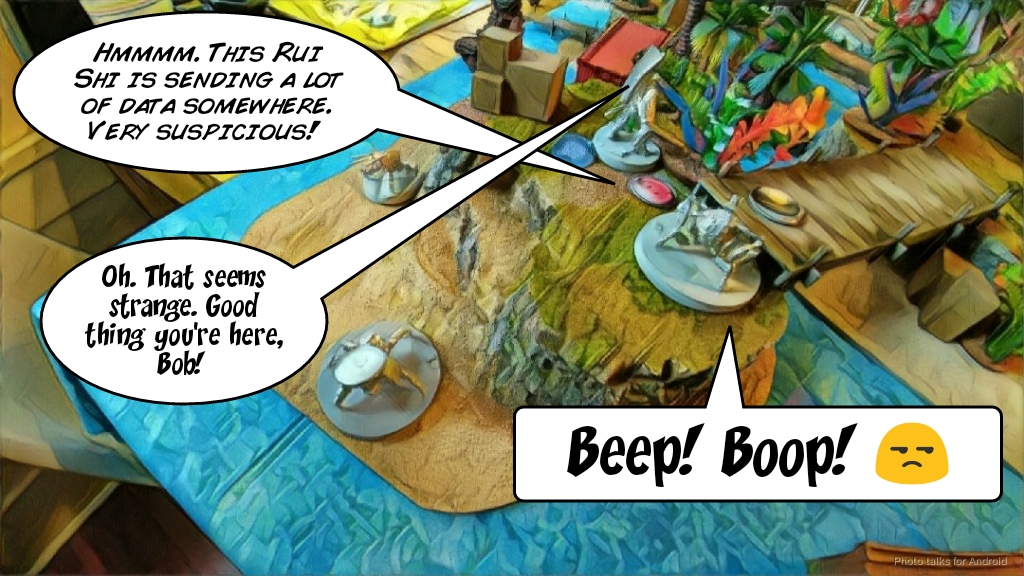
That Rui Shi had to go, so I threw Bob the Accountant on the catwalk right in front of the Rui Shi and the other ‘bots. Adam responded by putting his Daiyokai there to protect the bots. I don’t have a great datatracker for this mission, so I nominated my Al Fasid and Adam nominated the obvious choice–the Daiyokai.

Adam’s link did a great job of covering the AC2 as well as most of the approaches to it, meaning I would have to remove the Rui Shi first to make my smoke effective. Adam was not going to make it easy to do any of those things, and the board was going to make it nigh impossible to have an order-efficient path from my own deployment zone to Adam’s AC2. I would have to rely on the Fiday, backed up by probably Yasbir to get the job done.
Turn 1
Top of Turn 1 – Haqqislam
Adam docks me two orders in my first pool and throws up Overclock with his EVO. Rude. After canceling the Krakot’s order, I activate all three Mutts, pushing them forward. I didn’t bother throwing smoke with the rightmost and the leftmost ones, but the other one on the right threw smoke to cover the Djanbazan’s climb up the satellite dish at the end of my turn. Now that the Mutts were taken care of and my Krakot (which rolled +3 PH and Regen) didn’t blindly run at the Rui Shi and Daiyokai to get shot, it was time make Bob the Accountant earn his hazard pay.
I pushed Bob forward, letting the link take their discover rolls, one of which was successful. The Daiyokai and Rui Shi both delayed, so I just dropped prone between them and crawled into position behind the Rui Shi. Adam kept delaying with those two, letting me successfully close combat the Rui Shi and beat out its electric pulse, knocking it out of commission. The Daiyokai turned to cover the Fiday, but I kept his attention by blasting away at him with my Al Fasid after climbing the Al Fasid up onto the mesa. A few orders resulted in putting absolutely no wounds on the Daiyokai, but I needed to get the Krakot out of his dumb position on the boardwalk.

With only 7 orders to start, thanks to having to cancel the Krakot’s order, I didn’t have enough orders to waste on HMGing the Daiyokai, so I settled for a pair of coordinated orders on the Fiday, the Fasid, the Krakot, and my Djanbazan shock marksman rifle.
Edit: I actually didn’t spend an order to cancel in the game, I just was really tired when I wrote this. I sometimes remember games well enough to reconstruct order expenditure, but not this time. Thanks to Earl for the catch!
I moved all of them into position to see the Daiyokai, and let Adam pick his poison. He chose to shoot back at the Fasid, putting a wound on the big guy (thankfully I had already drained Adam of panzerfausts at this point). On the second order the Krakot was “safe” and the Fasid was able to put a single wound on the Daiyokai, evening up the wound count on both HI.

My Fiday managed to land smoke on the second coordinated order, taking the Daiyokai out of the fight, and the Djanbazan was now settled on the roof. I moved the Fiday into the smoke and threw him back into impersonation to make Adam miserable. I didn’t move my Djanbazan HMG at all, namely because I didn’t have any orders, but his facing was terrible…

I spent the rest of the Mutt’s orders moving them into better positions, especially the left Mutt, who I faced backwards to protect my left flank from Yuan Yuans, then passed the turn.
Bottom of Turn 1 – Ikari
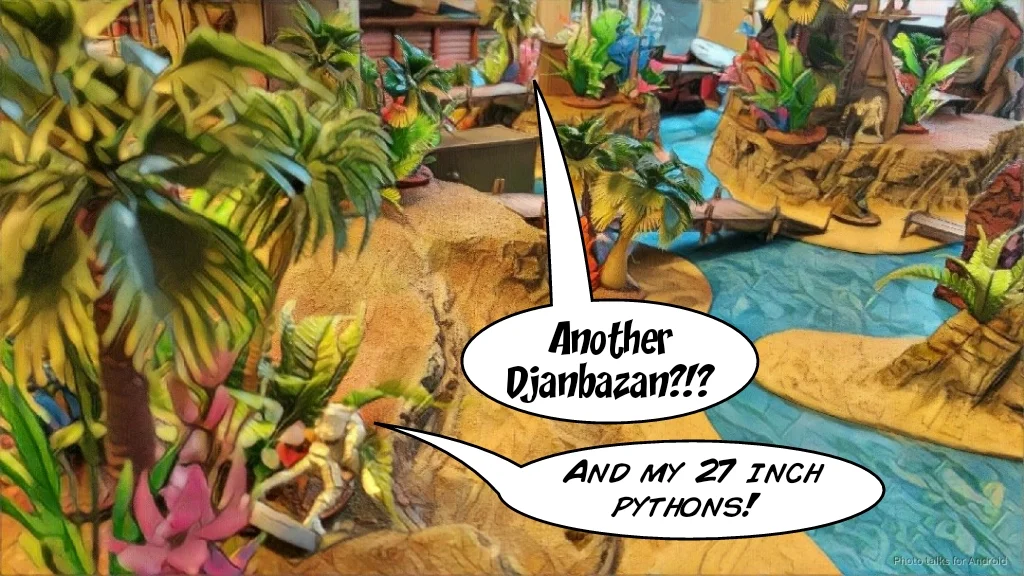
Adam started dropping in Yuan Yuans. The first walked on right in front of my Al’Hawwa, who quickly dispatched it with a boarding shotgun to the face. This did mean I was out of the camo state though…

The second attempted to come on in total cover, but failed his roll and ended up in front of Yasbir’s shotgun. I’ve gotten two of Adam’s DA CCW carriers down, but at the cost of two marker states. A reasonable trade thus far.

The third sticks the landing behind my Djanbazan HMG. The only unit that can see him is the Mutt, so I take my free pistol shot and miss. I fail my change face on the Djanbazan, so I’m forced to eat a chain rifle on Adam’s next order.

While I fail my dodge, I do pass ARM and fail guts so I can see the Yuan Yuan now.

I’m pretty worried that Adam will leave the Yuan Yuan there for me to deal with on my turn, so I dodge the Djanbazan backwards, away from the Mutt’s obligatory path to hopefully prevent them both from eating a chain rifle on my turn. Adam chain rifles again, surprising me, but I get another dodge in as a result. This time, I have the Mutt try to alert Yasbir so I can get more AROs on the Yuan Yuan, but Yasbir fails his dodge change face! Adam changes his focus to pressuring my right flank and activates the Daiyokai.

I didn’t have enough orders to put anyone into suppressive fire, which is a real travesty. Thankfully the saturation zone evens up the odds a little bit, and the Daiyokai and Al Fasid trade fire for a few orders. I put the Daiyokai into NWI, which gives me some hope, but those hopes are quickly dashed as Adam rolls two hits and I fail both ARM saves thanks to Fatality L1. Huh. Not every day that skill is relevant!

With the Fasid out of the way, Adam Redrums my Al’Hawwa with a surprise Ninja KHD! Sacrificing the Yuan Yuan to get that wasn’t what I would’ve done, but hey, it worked out.

Adam doesn’t want my leftmost Mutt to jam his Ninja on my upcoming turn, so he runs his Yuan Yuan into the open to chain rifle the Mutt. We trade chain rifles, and both of us lose our warbands. My Djanbazan shock marksman puts the nail in the coffin, blowing the Yuan Yuan’s brains out from his perch. I play it conservative and dodge with my Djanbazan, just in case, but it doesn’t matter.

Adam doesn’t want to leave only a single wound left on his Daiyokai, so he spends the rest of his order pool getting his Brawler doctor into position to fix the Daiyokai…

and gun down my Krakot. Will the rudeness ever cease? I needed him! Healing the Daiyokai actually got him a classified too, which is doubly unfortunate for me!

Turn 2
Top of Turn 2 – Haqqislam
My Mutt on the left is dead, so the two on the right advance. The more central one just climbs up to the Fasid’s final resting place, and the other runs straight at the Daiyokai, successfully landing smoke. I’ll take it! I sink waytoo many orders into trying to bring down an ARM8 Daiyokai with my shock marksman Djanbazan. I don’t even scratch the paint.
Discouraged, I throw the Djanbazan into suppression, fail to regenerate the Krakot, and fail to jam the Daiyokai with the nearby Muttawiah. I spend my last few orders putting some points on the board by grabbing D-charges with the Taureg and recamoing her, taking advantage of the temporary smoke to reposition her and Yasbir.

Things aren’t looking great for me, but at least we’re stuck in a stalemate for now.
Bottom of Turn 2 – Ikari
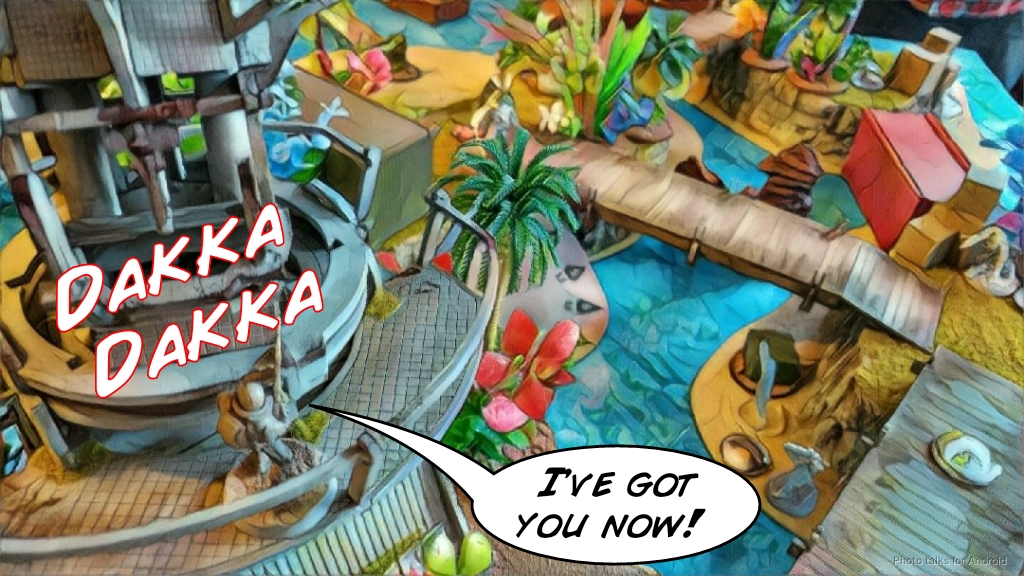
Yasbir gets his free holoechoes, then Adam sees a Mutt that can E/Marat his Daiyokai the moment he stands up, and the Daiyokai is of course being covered by my Djanbazan in suppression. To get himself out of this predicament, Adam tries to flash pulse them both with his Fugazi, but this brings him right into a perfect shotgun situation involving Bob the Accountant. This is far too juicy to pass up, so I take the shot and drop both ‘bots in one shot. My Mutt manages to beat the Fugazi’s flash pulse with smoke, and my Djanbazan tanks the flash pulse with aplomb, even passing his guts check to stay in suppression. I chose to suppress even though I was pretty sure I was out of 24″. Turns out I was right, but at least I’m still in suppression!

Adam still needs to deal with the Mutt, so he sacrifices the Brawler doctor to the Djanbazan shock marksman rifle. I attempt to jam him to get a WIP 15 face to face roll, but the three dice are better than one and I lose the Mutt. Hey, at least the Brawler’s down, I guess?

Adam sinks a good 4-5 orders into trading fire with my Djanbazan, but eventually he gets lucky and sneaks a shot through. He gets a little greedy (by his own admission) and tries to take out my other Djanbazan, almost losing his Daiyokai in the process.
He settles for getting the Daiyokai out of the Djanbazan HMG’s LoF and passes the turn.
Turn 3
Top of Turn 3 – Haqqislam
I leverage my remaining Mutt’s impetuous order for movement, then manage to drop an E/Marat template onto the Daiyokai, which Adam successfully dodges. Drat!

I really need to do something here. I don’t think I can get to the AC2 with enough orders to rack up damage points, so I go for the lieutenant snipe. After re-impersonating the Fiday, I get him into position and take the shot. I eyeball the distance, judge it to be outside of 8″, but there’s a chance I could catch the Tanko ML with a shotgun template… I agonize over this for a good 20-30 seconds then decide to be conservative and just throw three rifle dice at the Brawler.

I was relying on my surprise shot numbers, but Adam just rolls a crit. That’s super unfortunate!

I peer around the table for other options, at a loss for what to do. I don’t have the orders to get the Tuareg into position to D-Charge the AC2, and Yasbir doesn’t have any anti-material. I do find a keyhole from the Ninja’s position to enough of the Brawler lieutenant’s base though… and my Djanbazan is just the right number of orders away! After gunning down the Ninja with some fancy pie slicing under the corner of the building, I put four shots into the Brawler from outside of 32″.

Adam alerts with the link team to grant the Brawler a dodge change face, which is enough to beat out my rubbish HMG roll. The Brawler will live to fight another day! I move my Lieutenant into position, watching the AC2, just in case.

Bottom of Turn 3 – Ikari
My Mutt is out of E/Marat and Jammer range of the Daiyokai, so it’s safe for Adam to try and shoot him. I manage to land smoke though, forcing him to evaluate other options.
Adam cuts his link down to three members due to awkward positioning and link leader swapping, but he still fires one missile at my Djanbazan and one at my Mutt. I crit with the Djanbazan, ending the threat, but the Mutt fails his smoke roll and is blown off the table.

Adam pushes the Daiyokai forward towards the panoply on the right, now that the way is clear. I try to contest this with Yasbir and the Tuareg, but I can’t do a wound.

Adam’s got a few more orders after pushing the button, so he just guns down my Tuareg and Yasbir “just in case,” he says.

Neither of us have any damage on our AC2s, giving us three points apiece. We both have one set of items out of the panoply, thanks to Adam’s last turn rush with the Daiyokai, meaning we’re tied for that, and I don’t have anything securing his HVT, meaning it’s a
4-3 Ikari Victory!
Talk about much ado about nothing! We basically got nothing mission related done, hah! This scenario is weird because you get points for basically the two of you just standing around and drinking beer all game. Mmm beer…
Notes
Notes for Me
- Adam and I talked at length about the table after the game. We both think it was pretty fair in terms of deployment zones, so no worries there. A big improvement over my game with Obi from the last tournament.
- Movement on the table is a pain in the butt. I think I had a false sense that moving in the water was really bad, so I didn’t really think about it. Both of us did, really. The boardwalks are deceptive, as they’re actually quite inefficient.
- Adam thought I would’ve been better served by pushing my Krakot through the center of the table, through the water protected by Yasbir’s smoke. That probably would’ve let me get to the AC2 on turn 2 pretty safely. This speaks to the point just above too.
- I think the Rui Shi absolutely dictated my first turn. Had I not dealt with it I probably would’ve lost my entire right flank.
- I was pretty pleased with the Fiday’s performance this game, in general. Had I successfully knocked out his lieutenant and gotten my Djanbazan into position to cover the HVT, I could’ve tied up the game or perhaps even won it depending on whether or not Adam could find a way to get a panoply open.
- Adam was surprised I didn’t spec-fire smoke with the Al Fasid. I was surprised to be reminded that it had smoke grenades!
- All in all I think I played the small-scale tactical battle well this game, I just didn’t have a strong plan to deal with the AC2. Had I deployed the Krakot more conservatively as suggested above this game could’ve been mine. I distinctly remember feeling a little uncomfortable about his placement. I should listen to my gut more.
- My Mutts were supremely annoying this game. I definitely need more orders in their pool to use their kit effectively.
- I don’t like 10 orders + some number of Mutts… Will have to think about this some more.
- I wish I had some more heavy hitters with DA CCWs in this list. The Taureg and Al’Hawwa are okay, but I could consider dropping the Tuareg for something else… maybe some points shuffling would get me an Asawira AP Rifle, LSG, DA CCW? Hmmmmmm….
- Adam later noted that I could have used Yasbir in my last turn to grab something else from the Panoply on the right, making it very difficult for Adam to tie me up on opened Panoplies. I was concerned that both the Daiyokai and the Ninja would have been able to open both Panoplies and tie me up, so I figured the Lt snipe was the more effective, if less reliable, play. Killing the Ninja was an added bonus to deny him an order and a sneaky DA CCW-toting specialist. Definitely one of those “who knows?” things though.
Notes for Adam
- He was a little annoyed at himself for getting the Daiyokai into trouble against my Djanbazan HMG. There was no real need for that, and he could’ve just dashed across the boardwalk to where the Krakot died and only exposed himself once. He had 2 effective wounds there thanks to NWI so this would’ve been fine.
- The Daiyokai is disgusting. It does a ton of stuff and is really really tough to shift. I can’t wait to field him myself!
- Adam’s link placement was supremely irritating. He did sorta shoot himself in the foot by putting them too far apart though, making it very difficult to switch link leaders without exposing part of the link to AROs.
- I think that Adam should’ve dropped the Yuan Yuans into the center and gone straight for the AC2. I had done a good job of buttoning it up with mines and two MSV2 troopers, which is why he didn’t, I guess.
- All in all the table is good, and more importantly in this configuration fair. I do think that it’s really really hard with this mission, even for seasoned players like Adam and myself.