
Infinity Battle Reports: GenCon 2017 with PanO

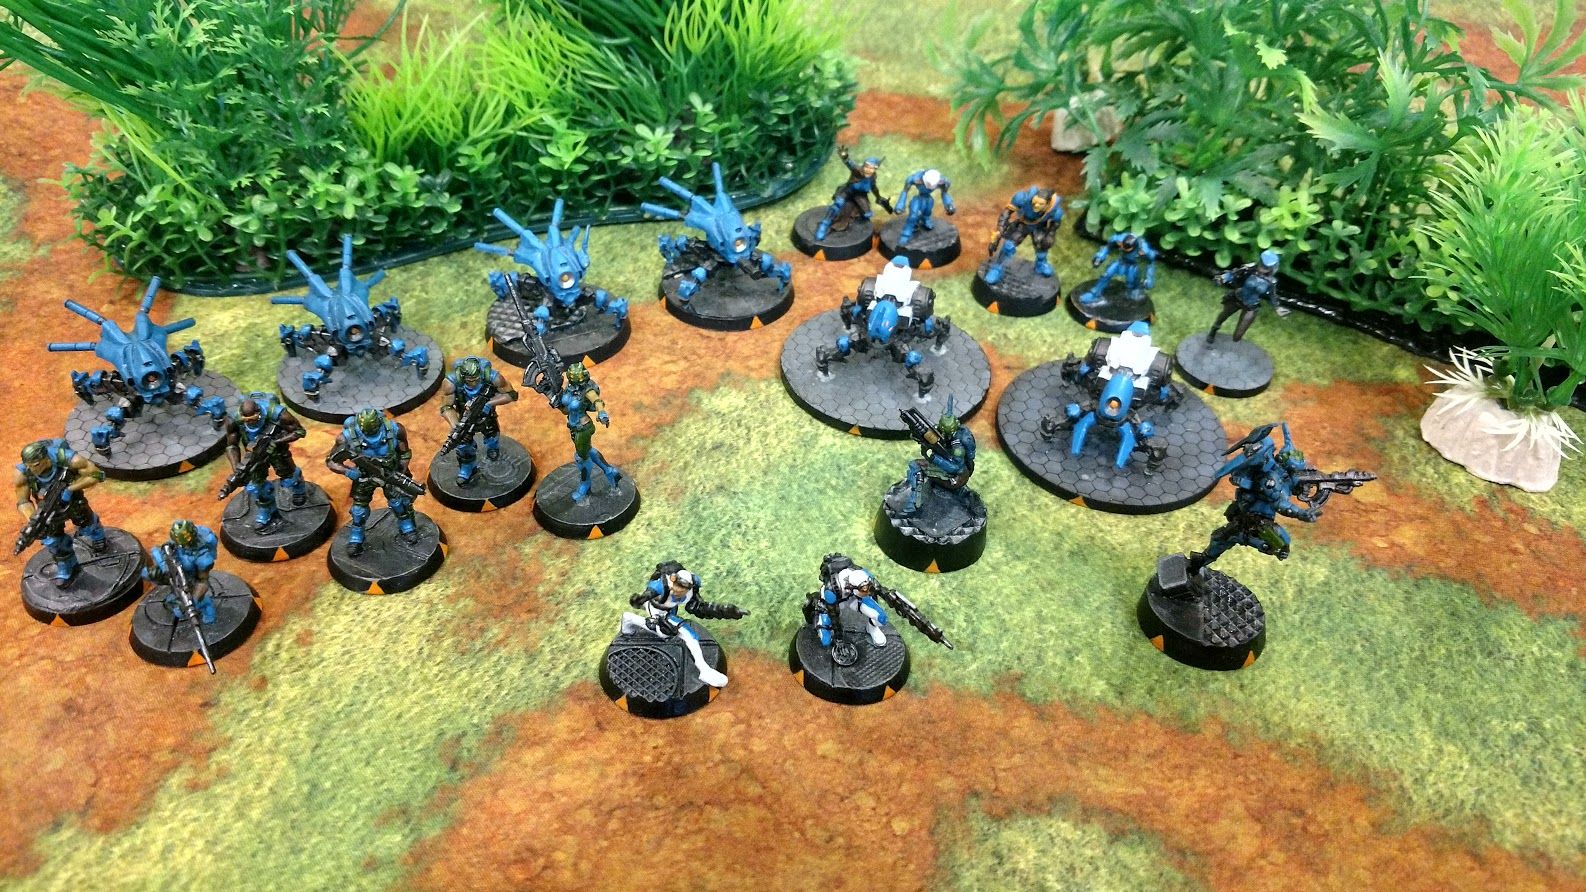
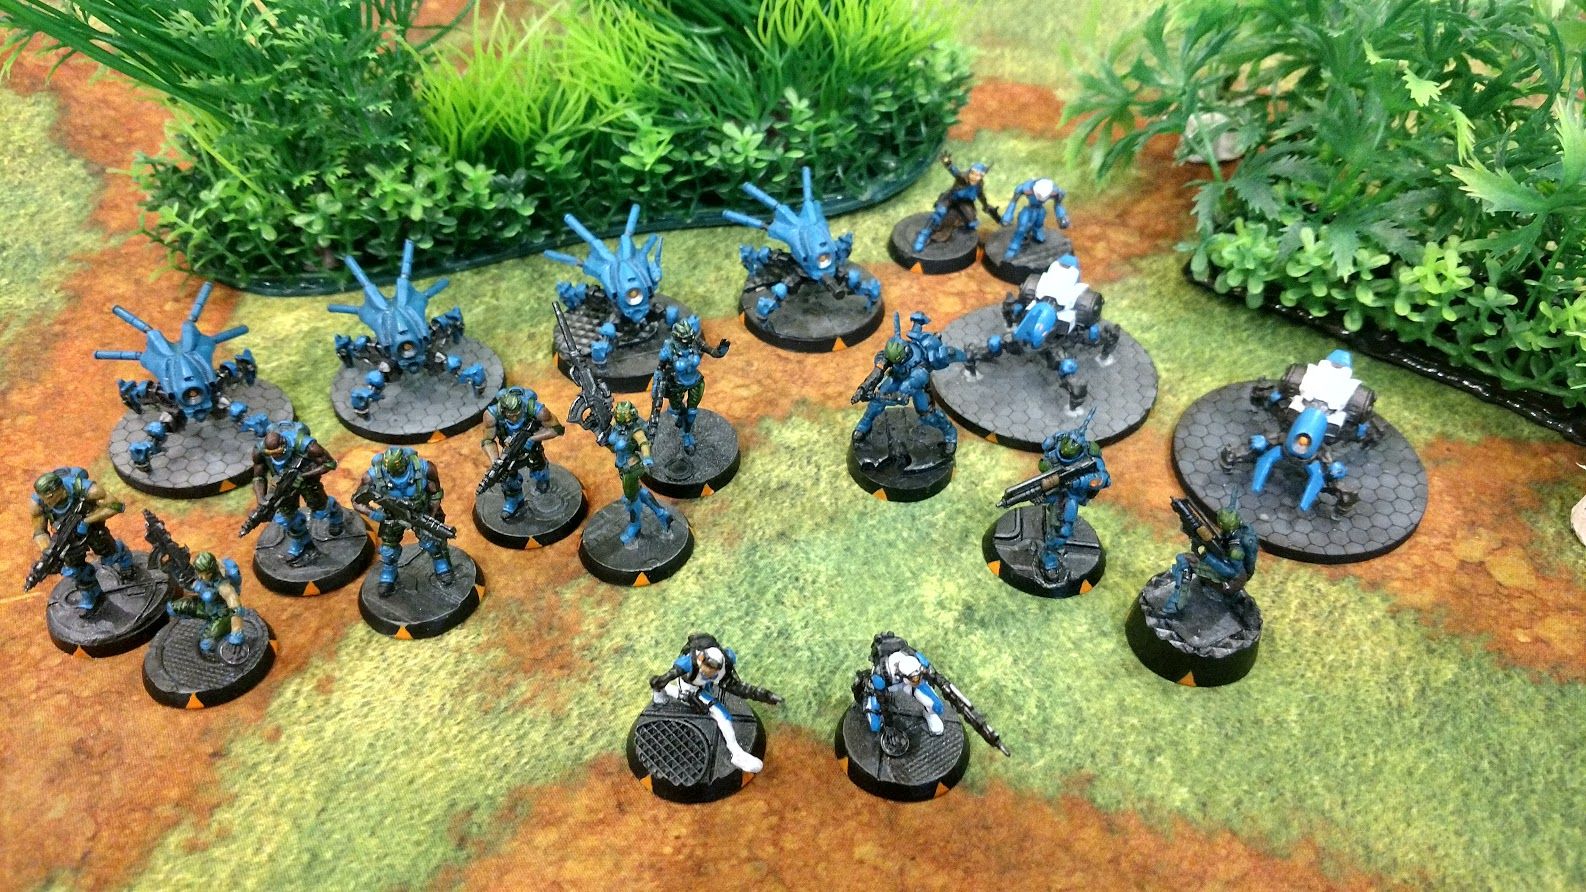
Today we have a guest article by my buddy Michael, or Barakiel as he is known of the forums. He took his PanOceania to Gencon and played them into the ground! Check out his recap of playing 11 games with PanOceania in a single weekend. The decision to use PanOceania was motivated more by my personal comfort zone than by them being ideally suited for the missions. When you're playing in a big, loud, exhausting environment against new players, it pays to use a force than you know like the back of your hand.
So with that motivation, Acontecimento and NeoTerra came with me.
Thursday, Friday and Saturday each had a tournament. Saturday's tournament was the Warsenal Invitational, with the winner getting an expense-paid trip to next year's Interplanetary. That event was a little different this year, more on that to come.
Showing up to GenCon, I wasn't in the Invitational yet. If I won on Thursday or Friday though, that would earn me a spot.
Thursday: Transmission Matrix, Supplies, Firefight, Highly Classified
![]() Transmission Matrix/Firefight/Supplies
──────────────────────────────────────────────────
Transmission Matrix/Firefight/Supplies
──────────────────────────────────────────────────
GROUP 1
 10
10
![]() NAGA Hacker (Killer Hacking Device) Combi Rifle, Antipersonnel Mines / Pistol, Knife. (0 | 30)
NAGA Hacker (Killer Hacking Device) Combi Rifle, Antipersonnel Mines / Pistol, Knife. (0 | 30)
![]() REGULAR (Sapper) MULTI Sniper Rifle / Pistol, Knife. (1.5 | 22)
REGULAR (Sapper) MULTI Sniper Rifle / Pistol, Knife. (1.5 | 22)
![]() REGULAR (Sapper) MULTI Sniper Rifle / Pistol, Knife. (1.5 | 22)
REGULAR (Sapper) MULTI Sniper Rifle / Pistol, Knife. (1.5 | 22)
![]() REGULAR Spitfire / Pistol, Knife. (1 | 16)
REGULAR Spitfire / Pistol, Knife. (1 | 16)
![]() REGULAR Paramedic (MediKit) Combi Rifle / Pistol, Knife. (0 | 12)
REGULAR Paramedic (MediKit) Combi Rifle / Pistol, Knife. (0 | 12)
![]() REGULAR Combi Rifle / Pistol, Knife. (0 | 10)
REGULAR Combi Rifle / Pistol, Knife. (0 | 10)
![]() REGULAR Lieutenant Combi Rifle / Pistol, Knife. (0 | 10)
REGULAR Lieutenant Combi Rifle / Pistol, Knife. (0 | 10)
![]() PATHFINDER DRONBOT Combi Rifle, Sniffer / Electric Pulse. (0 | 16)
PATHFINDER DRONBOT Combi Rifle, Sniffer / Electric Pulse. (0 | 16)
![]() TRAUMA-DOC Combi Rifle / Pistol, Knife. (0 | 14)
TRAUMA-DOC Combi Rifle / Pistol, Knife. (0 | 14)
![]() PALBOT Electric Pulse. (0 | 3)
PALBOT Electric Pulse. (0 | 3)
![]() AKAL COMMANDO Hacker (Assault Hacking Device) Combi Rifle / Pistol, E/M CCW. (0.5 | 28)
AKAL COMMANDO Hacker (Assault Hacking Device) Combi Rifle / Pistol, E/M CCW. (0.5 | 28)
GROUP 28  1
1
![]() NAGA (Forward Observer) Combi Rifle, Antipersonnel Mines / Pistol, Knife. (0 | 28)
NAGA (Forward Observer) Combi Rifle, Antipersonnel Mines / Pistol, Knife. (0 | 28)
![]() BAGH-MARI HMG / Pistol, Knife. (1.5 | 26)
BAGH-MARI HMG / Pistol, Knife. (1.5 | 26)
![]() MULEBOT (Minesweeper, Repeater) Electric Pulse. (0 | 8)
MULEBOT (Minesweeper, Repeater) Electric Pulse. (0 | 8)
![]() MULEBOT (Minesweeper, Repeater) Electric Pulse. (0 | 8)
MULEBOT (Minesweeper, Repeater) Electric Pulse. (0 | 8)
![]() FUGAZI DRONBOT Flash Pulse, Sniffer / Electric Pulse. (0 | 8)
FUGAZI DRONBOT Flash Pulse, Sniffer / Electric Pulse. (0 | 8)
![]() FUGAZI DRONBOT Flash Pulse, Sniffer / Electric Pulse. (0 | 8)
FUGAZI DRONBOT Flash Pulse, Sniffer / Electric Pulse. (0 | 8)
![]() FUGAZI DRONBOT Flash Pulse, Sniffer / Electric Pulse. (0 | 8)
FUGAZI DRONBOT Flash Pulse, Sniffer / Electric Pulse. (0 | 8)
![]() MACHINIST Combi Rifle, D-Charges / Pistol, Knife. (0 | 15)
MACHINIST Combi Rifle, D-Charges / Pistol, Knife. (0 | 15)
![]() PALBOT Electric Pulse. (0 | 3)
PALBOT Electric Pulse. (0 | 3)
![]() TECH-BEE (Remote Assistant Level 1, Specialist Operative) Flash Pulse / Pistol, Knife. (0 | 5)
TECH-BEE (Remote Assistant Level 1, Specialist Operative) Flash Pulse / Pistol, Knife. (0 | 5)
6 SWC | 300 Points
![]() Transmission Matrix/Firefight/Supplies
──────────────────────────────────────────────────
Transmission Matrix/Firefight/Supplies
──────────────────────────────────────────────────
GROUP 110
![]() NAGA Hacker (Killer Hacking Device) Combi Rifle, Antipersonnel Mines / Pistol, Knife. (0 | 30)
NAGA Hacker (Killer Hacking Device) Combi Rifle, Antipersonnel Mines / Pistol, Knife. (0 | 30)
![]() BAGH-MARI HMG / Pistol, Knife. (1.5 | 26)
BAGH-MARI HMG / Pistol, Knife. (1.5 | 26)
![]() REGULAR (Sapper) MULTI Sniper Rifle / Pistol, Knife. (1.5 | 22)
REGULAR (Sapper) MULTI Sniper Rifle / Pistol, Knife. (1.5 | 22)
![]() REGULAR Spitfire / Pistol, Knife. (1 | 16)
REGULAR Spitfire / Pistol, Knife. (1 | 16)
![]() REGULAR (Minelayer, Sensor) Combi Rifle, Antipersonnel Mines / Pistol, Knife. (0.5 | 14)
REGULAR (Minelayer, Sensor) Combi Rifle, Antipersonnel Mines / Pistol, Knife. (0.5 | 14)
![]() REGULAR Paramedic (MediKit) Combi Rifle / Pistol, Knife. (0 | 12)
REGULAR Paramedic (MediKit) Combi Rifle / Pistol, Knife. (0 | 12)
![]() REGULAR Combi Rifle / Pistol, Knife. (0 | 10)
REGULAR Combi Rifle / Pistol, Knife. (0 | 10)
![]() REGULAR Combi Rifle / Pistol, Knife. (0 | 10)
REGULAR Combi Rifle / Pistol, Knife. (0 | 10)
![]() REGULAR Lieutenant Combi Rifle / Pistol, Knife. (0 | 10)
REGULAR Lieutenant Combi Rifle / Pistol, Knife. (0 | 10)
![]() TRAUMA-DOC Combi Rifle / Pistol, Knife. (0 | 14)
TRAUMA-DOC Combi Rifle / Pistol, Knife. (0 | 14)
![]() PALBOT Electric Pulse. (0 | 3)
PALBOT Electric Pulse. (0 | 3)
GROUP 29
![]() NAGA (Forward Observer) Combi Rifle, Antipersonnel Mines / Pistol, Knife. (0 | 28)
NAGA (Forward Observer) Combi Rifle, Antipersonnel Mines / Pistol, Knife. (0 | 28)
![]() BAGH-MARI HMG / Pistol, Knife. (1.5 | 26)
BAGH-MARI HMG / Pistol, Knife. (1.5 | 26)
![]() PATHFINDER DRONBOT Combi Rifle, Sniffer / Electric Pulse. (0 | 16)
PATHFINDER DRONBOT Combi Rifle, Sniffer / Electric Pulse. (0 | 16)
![]() MULEBOT (Minesweeper, Repeater) Electric Pulse. (0 | 8)
MULEBOT (Minesweeper, Repeater) Electric Pulse. (0 | 8)
![]() MULEBOT (Minesweeper, Repeater) Electric Pulse. (0 | 8)
MULEBOT (Minesweeper, Repeater) Electric Pulse. (0 | 8)
![]() FUGAZI DRONBOT Flash Pulse, Sniffer / Electric Pulse. (0 | 8)
FUGAZI DRONBOT Flash Pulse, Sniffer / Electric Pulse. (0 | 8)
![]() FUGAZI DRONBOT Flash Pulse, Sniffer / Electric Pulse. (0 | 8)
FUGAZI DRONBOT Flash Pulse, Sniffer / Electric Pulse. (0 | 8)
![]() FUGAZI DRONBOT Flash Pulse, Sniffer / Electric Pulse. (0 | 8)
FUGAZI DRONBOT Flash Pulse, Sniffer / Electric Pulse. (0 | 8)
![]() AKAL COMMANDO Combi Rifle / Pistol, E/M CCW. (0 | 22)
AKAL COMMANDO Combi Rifle / Pistol, E/M CCW. (0 | 22)
6 SWC | 299 Points
Game 1: Transmission Matrix versus Corregidor
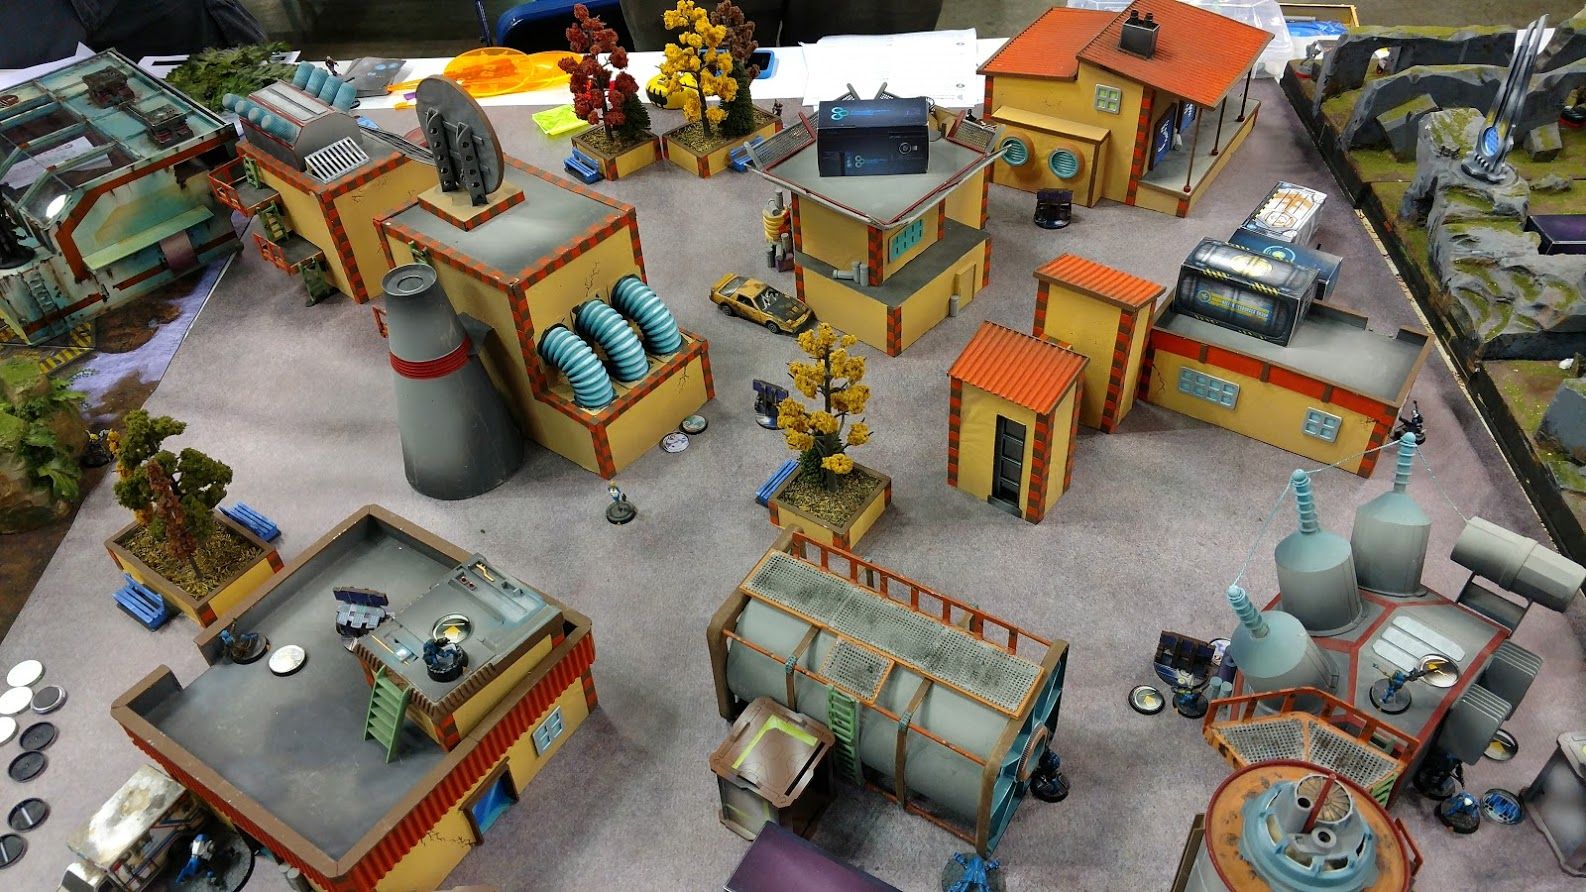
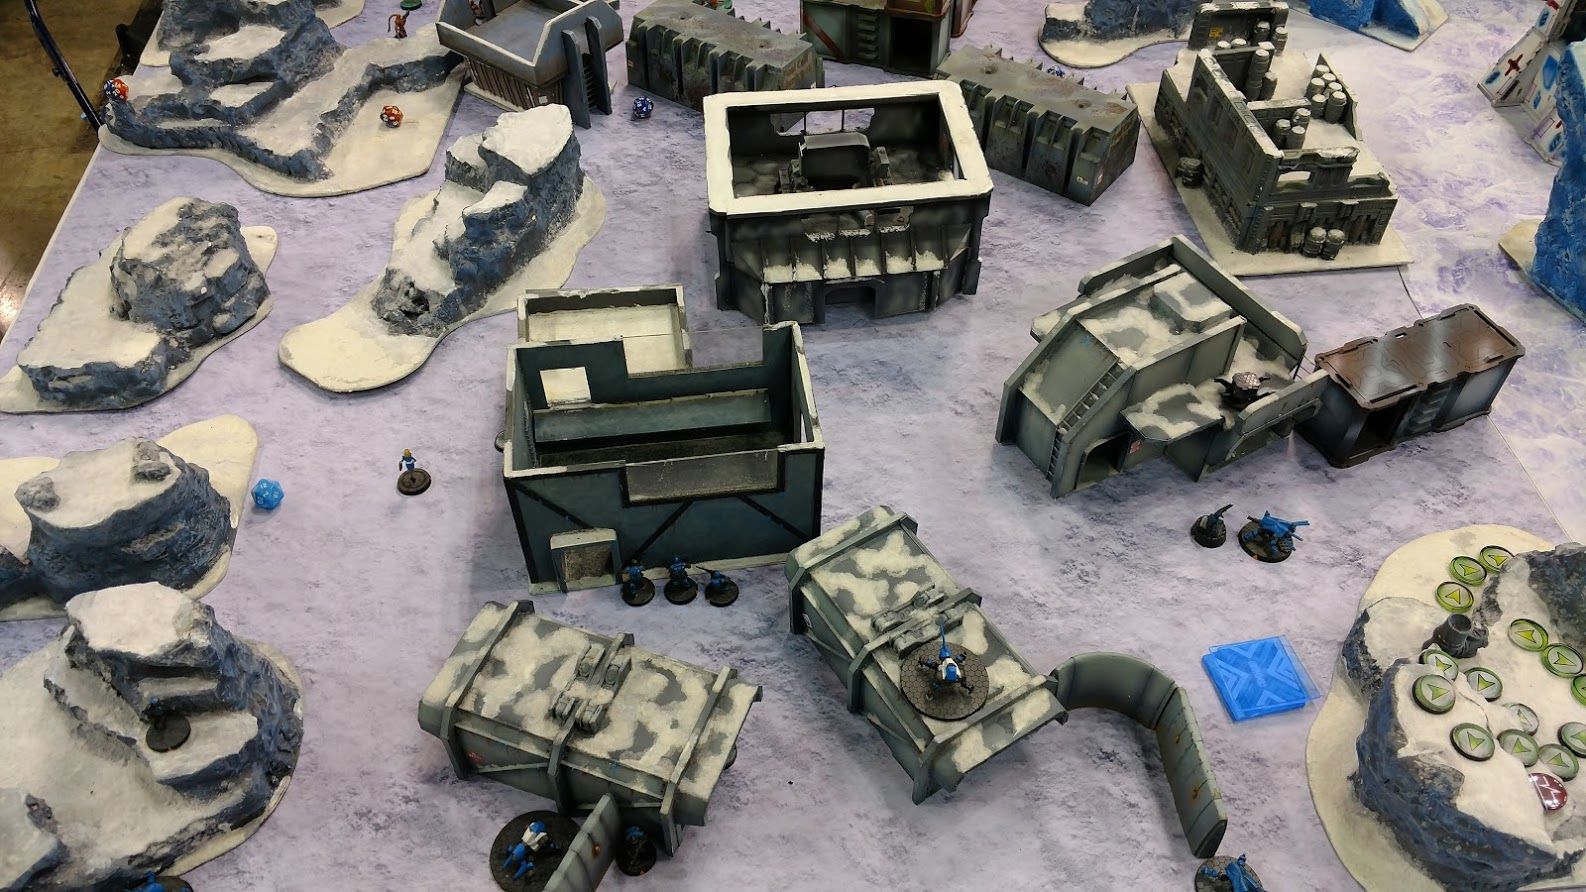
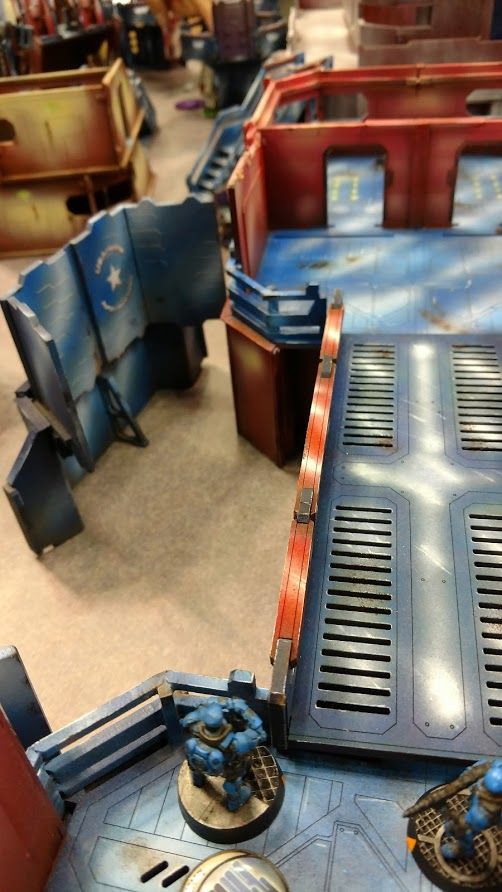
My opponent had a fairly standard Corregidor list, using most of the tools I myself would use. The table had a couple of very, very long diagonal fire lanes. Winning deployment, I set up the Regulars to camp my right antennae, owning a long lane with sapper snipers and watching a table edge for Tomcats, while a Bagh Mari HMG and my flash pulse/baggage bots camped my left beacon.
You can see here that LoF was blocked pretty well by those center buildings, but the diagonal lanes were big:
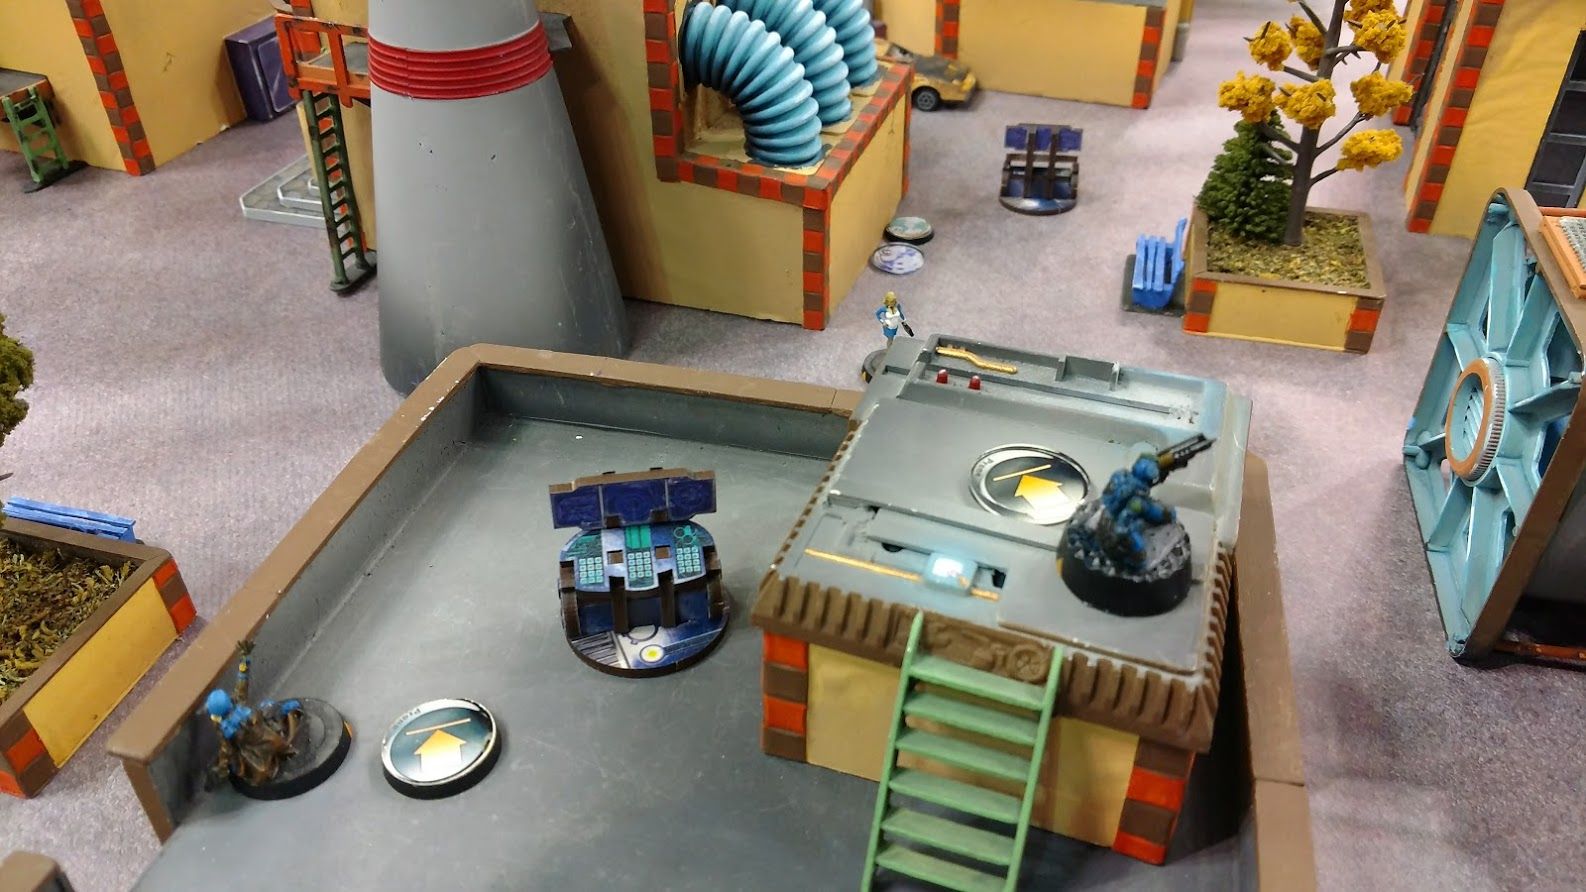
On this type of table, with some big lanes and planter trees that were low Vis/Sat, I was pretty sure I had good tools for this mission. I was expecting a conventional challenge of my overwatch troops with Intruders, but that challenge didn't come as my opponent instead maneuvered his Alguaciles to fight with the linked HMG. He had some decent success, knocking down some regulars, but I was able to doctor them back and keep him off the middle objective all game with Naga antipersonnel mines.
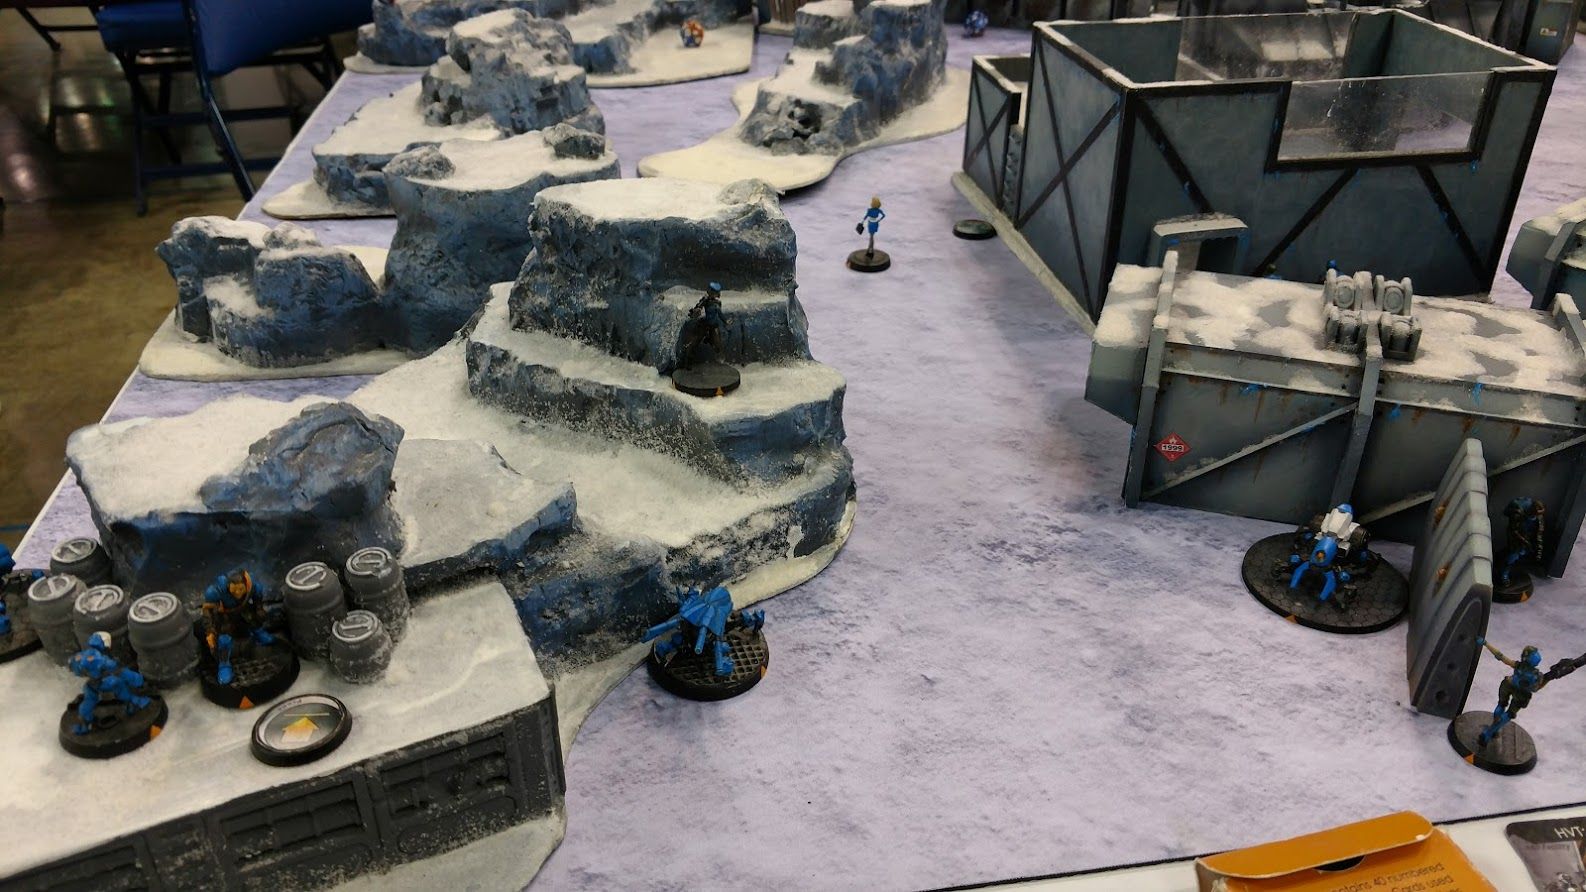
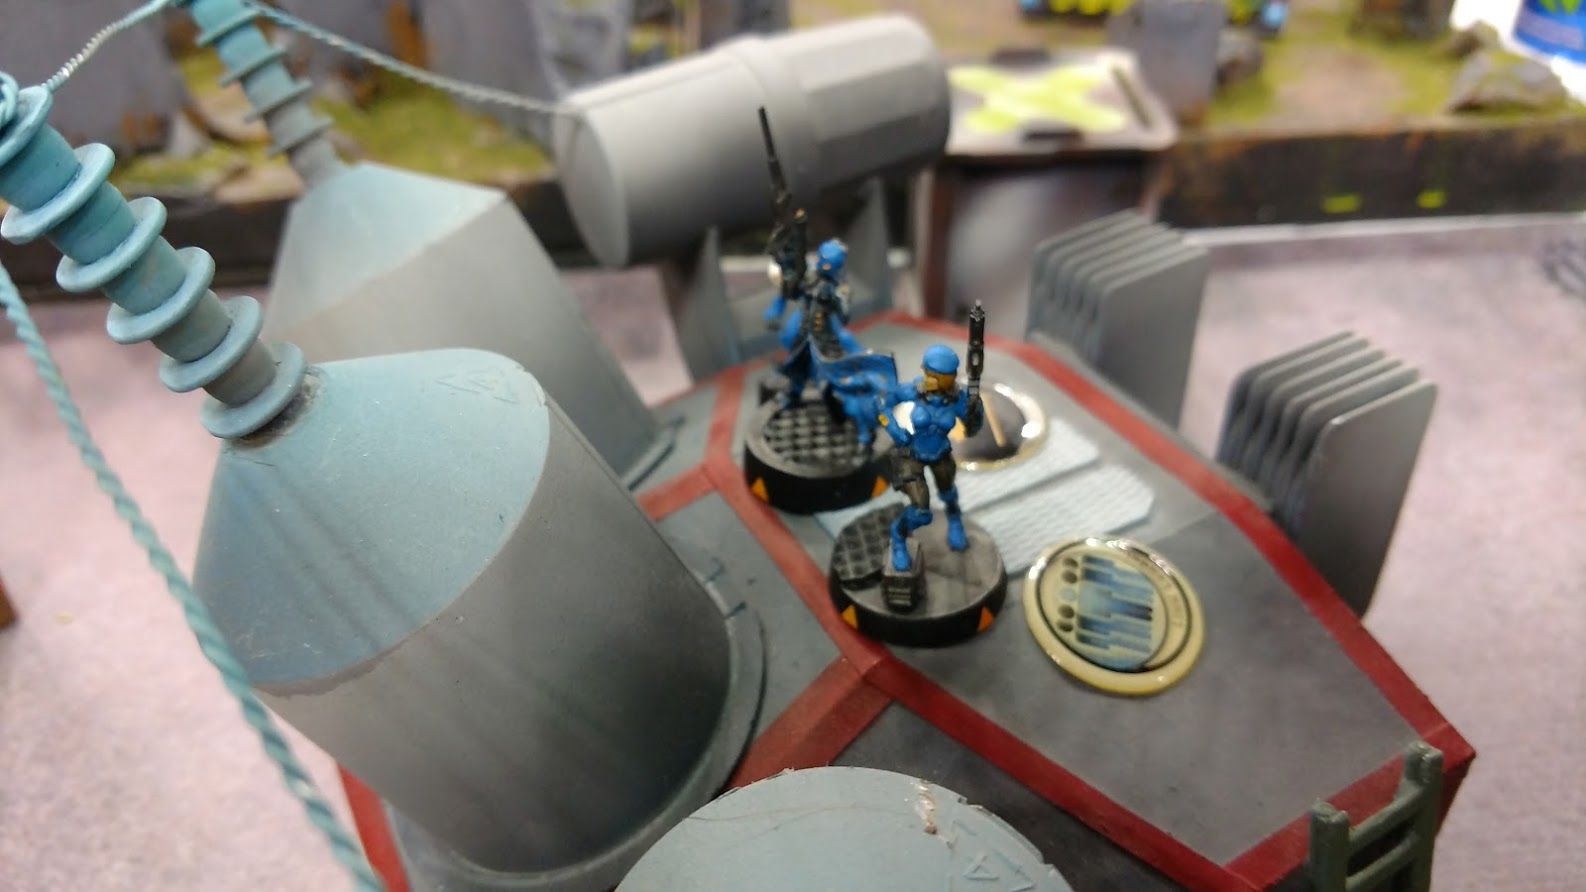
In this shot, you can see the Bagh Mari up top to help overwatch the Naga and his antipersonnel mine, visible as Camo Tokens:
The Regular Sniper and Spitfire helping to lock down their lane:
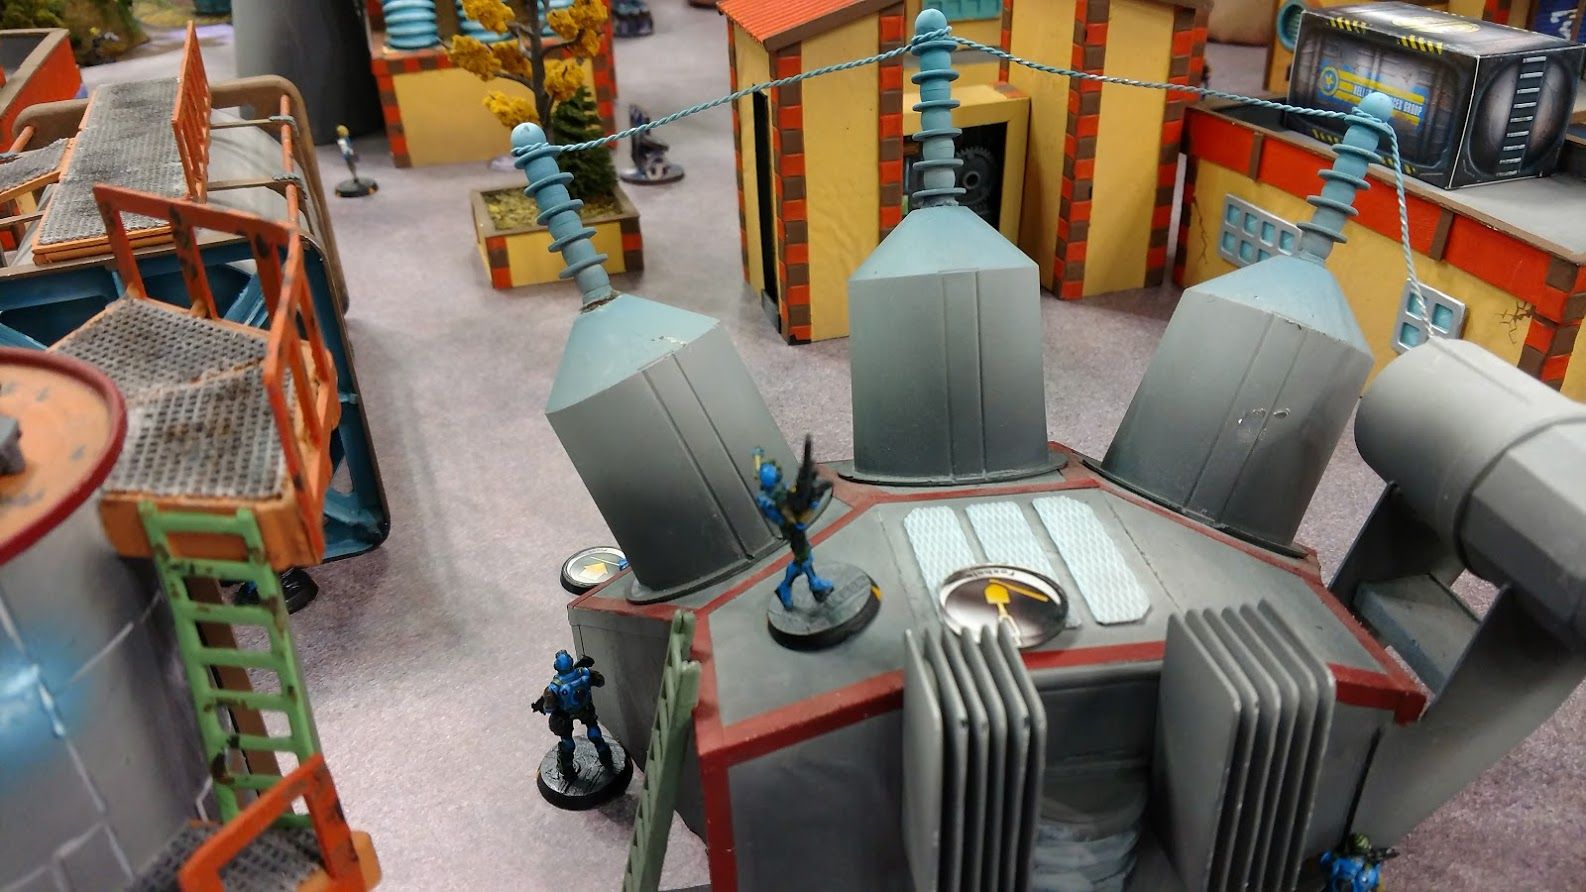
The all stars of this game were the Nagas, which were able to challenge the chokepoints with their mines and even challenge my opponent's antennaes.
I believe I won this won 10-1.
Game 2: Supplies versus Haqq Islam
I knew my opponent through reputation. He placed very highly at the Las Vegas Open, and I was looking forward to the challenge this game.
I won the roll off, and my opponent picked a side with some great vantage points. The side I ended up with though had great lanes to reach two of the three supply crates, especially the rightmost one where I basically had a catwalk and a covered building that would let me reach it very safely.
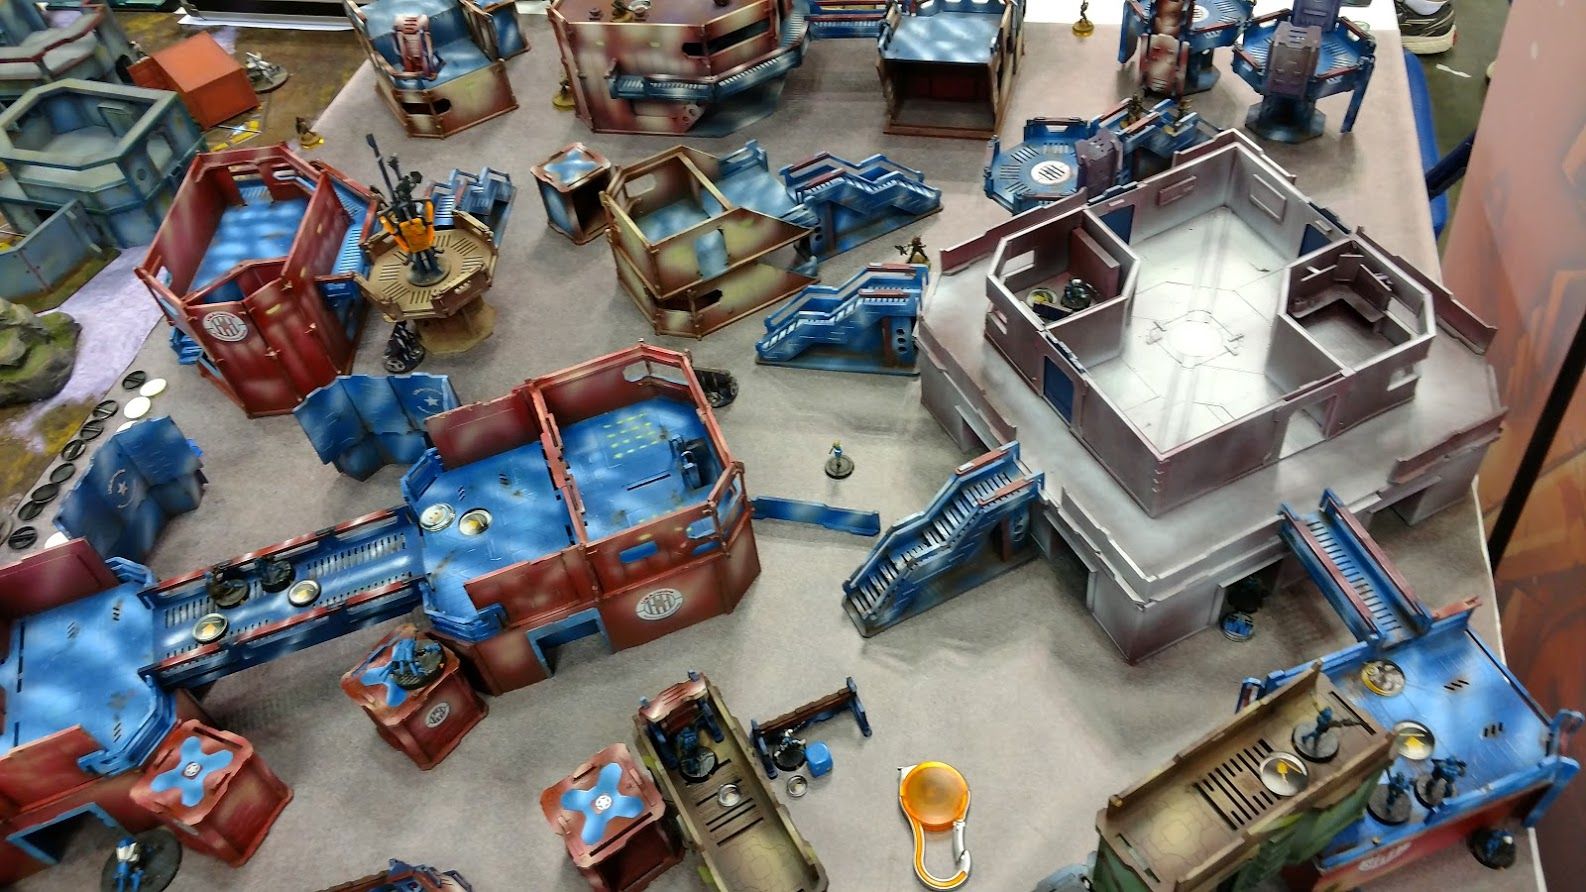
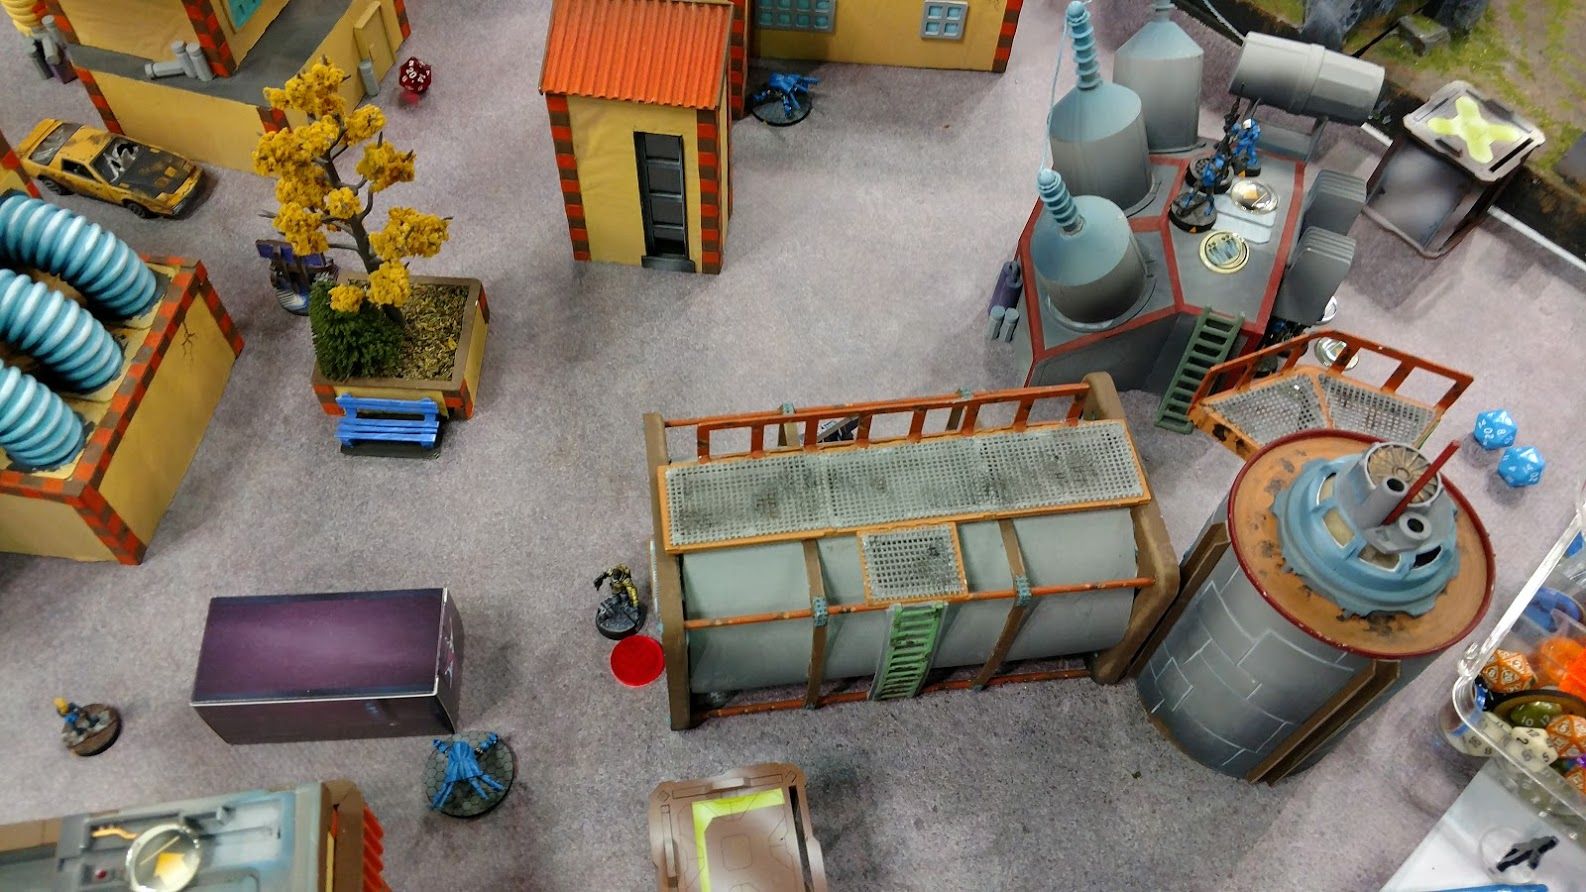
You can see here the general layout of my deployment zone, and how that rightmost building (with the catwalk in my DZ) providing a very good launching point:
Deployment was easy: I set up to anchor my middle and right with a strong defense, to let the Nagas grab the middle and right objectives. The left had a token defense, with Fugazi and Bagh Mari potentially able to contest it if I so chose.
Turn one wasn't quite the clean sweep I had hoped for, but it was strong. The Regular Minelayer advanced up a couple Orders and did a quick Sensor Sweep to reveal one of his Camo Tokens, letting the Naga use Mines + Combi Rifle to take it down. My opponent had a few clutch Dodges that meant the Naga wouldn't be able to run the box all the way back, but at least he was poised. I also revealed his center Camo Token, the Pathfinder dropping a sniffer nearby to stop that Token from Recamoing, meaning it would have to walk out into linked Sniper territory if it wanted to grab the center box. So while I hadn't retrieved the boxes Turned 1, I was comfortable I had locked them down effectively.
My opponent countered with Mutts, shuffling some Orders around so he could dash up and try to isolate the Nagas. I had recamoed them of course, but Jammer doesn't particularly mind. My thought was to actually use the Nagas to tempt my opponent into making Jam attempts, which are actually fairly low probability, and then simply follow up with a second wave of Regulars or Bots to grab the boxes if the Nagas ended up isolated.
Here's the rightmost Naga correctly remembering to turn his radio off when people are messing with it. His room held the righmost Supply box, which he was able to sneak back to my DZ:

With a little dice fortune, it wasn't even necessary. The Nagas did well with their Reset attempts, to let me grab the boxes Turn 2 and rush them back. My opponent managed to grab the 3rd box, but I was still feeling good with both Nagas tucked safely back in my DZ.
I think this one ended 6-4.
Game 3: Firefight versus USAriadna
I was looking forward to his one... A nice straightforward mission versus a fun opponent on a great table.
My Regular LT was leading like a boss, letting me win the roll. I certainly went first, wanting to interdict any incoming Infiltrating Grunts. Good thing too, because my opponent made all three of his Infiltration rolls.
Firefight actually required a little deliberation here, because my list (though heavy on Orders) lacked good solo rambo units. As a result, I set up my Regulars as defensively as possible to watch backline and table edges, the Fugazi to double up on defensive AROs with Flash Pulse, and planned to use my Bagh Mari to sweep lanes while the Nagas went hunting.
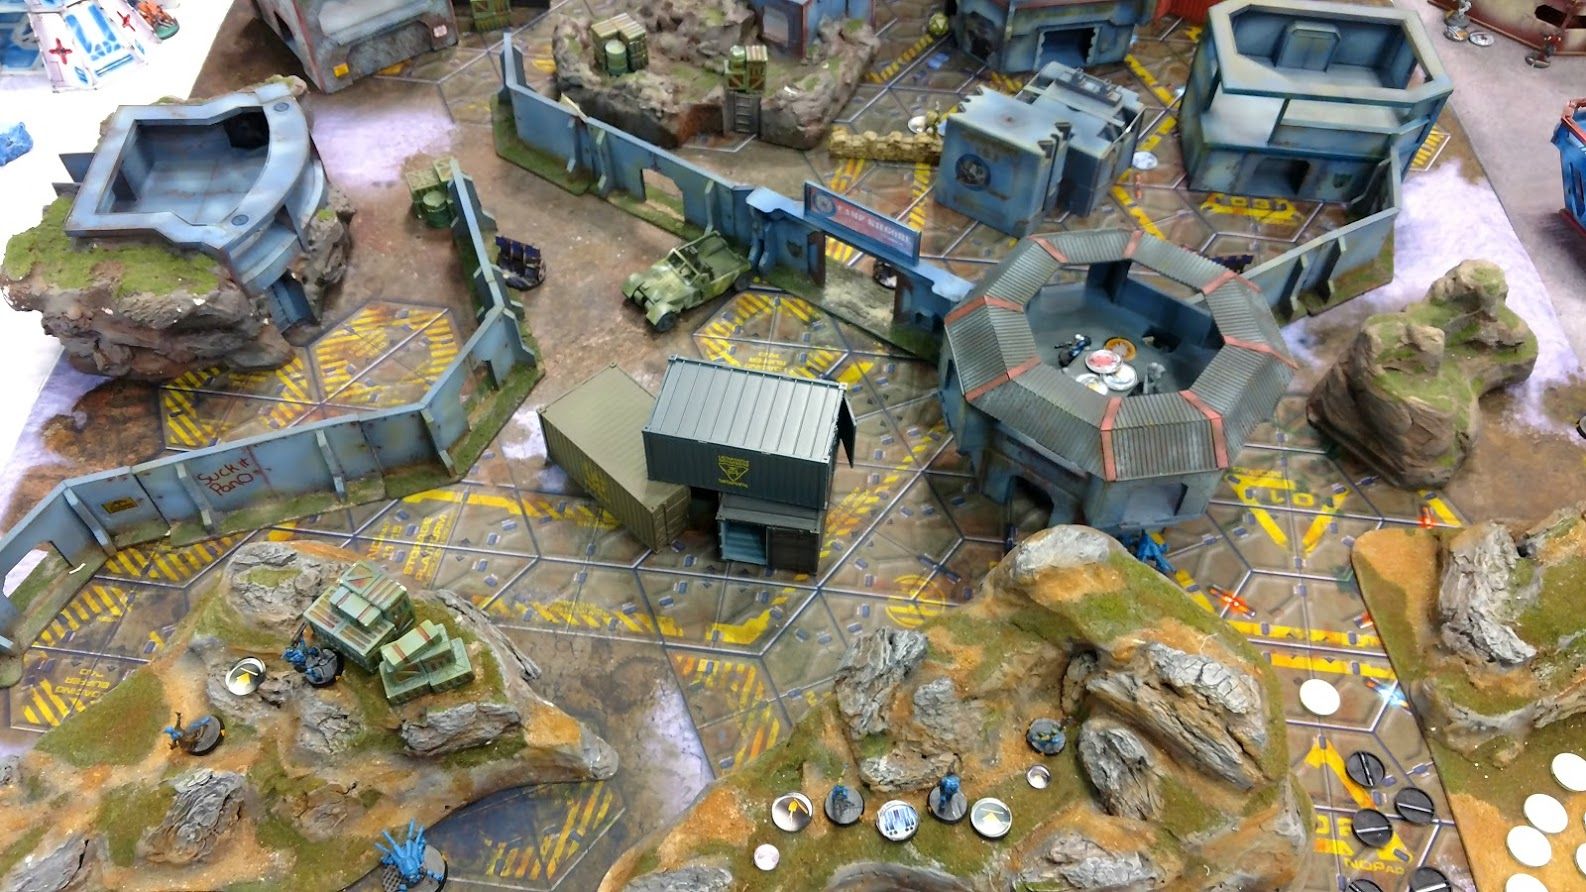
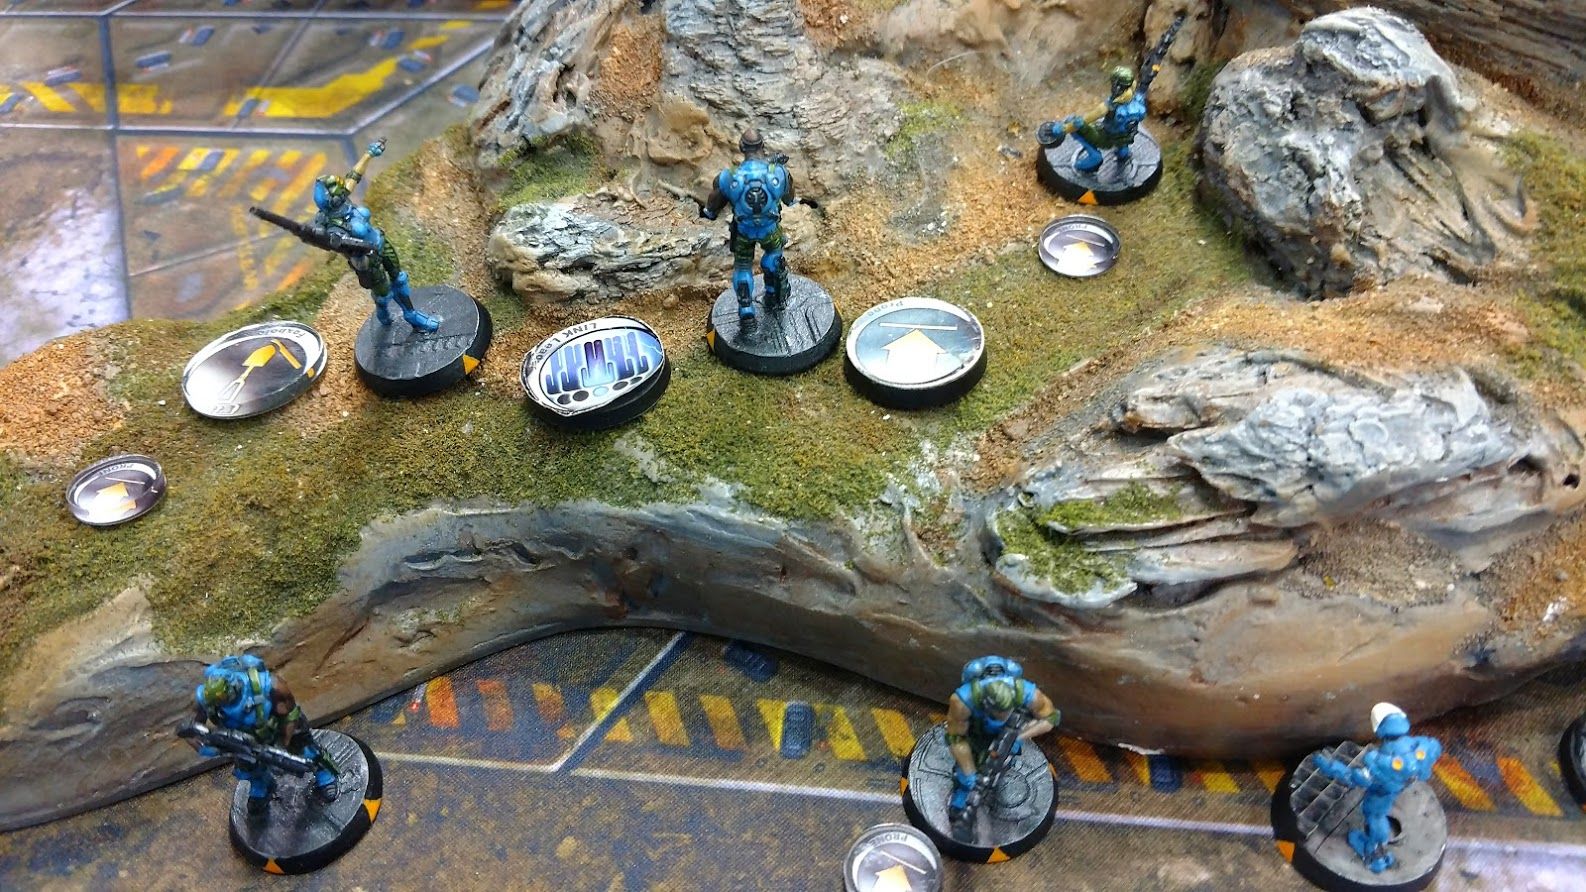
A view from my DZ, with the Regulars dug in among the hills but able to watch out for incoming AD of Flamethrower threats, with the Bagh Mari on the left providing a very strong fire superiority role from that hilltop:
Have I mentioned how much I love Regulars?
Thankfully this worked. The Nagas were able to sneak in on the Infiltrating Grunts from behind, taking down two of them while a Bagh Mari bagged a third. My opponent survived a couple of unopposed shots in the back with good Change Facings, but the dice balanced out when I passed a couple of Flamethrower saves. One of the Nagas managed to scramble into a bunker for a long, long shot into my opponent's DZ to see his Minuteman LT, scoring me a good Loss of Lieutenant.
I was hoping to put the nail in the coffin with my Akalis, who only had to take down a Maverick FO, a Dozer, and two 5 point baggage bots for a huge swing in points. The Akalis managed its change facing when I walked on but went down to the Akalis. The 5 point bot then ate up 4 orders, either through crit Dodge or simply passing armor saves, meaning that the Akalis accomplished very little with the 8 orders I had given him to try and tear up my opponent's backline. I ended with the Akalis in suppressive in my opponent's DZ, but he simply walked on an Airborne Ranger and SMGed him in the back to remove the issue. His Airborne Deployment had a good run, scoring some kills, grabbing a panoply, and generally making me nervous.
Thankfully the Regulrs, who had been keeping their heads down for most of the game, were able to lock down the last turn by hitting some grunts and the Ranger with MULTI Sniper and Combi Fire. With the Nagas still active and grabbing panoplies, I finished this one in good stead.
Game 4: Highly Classified versus ISS
This is, without question, my least favorite ITS mission. So I wasn't looking forward to it.
My opponent was rocking ISS, which was both a good thing and a bad thing. Bad in the sense that he'd have lots of Orders, lots of Smoke, lots of MSV, and high quality Specialists. It was good though in the sense that they rely heavily on the Sophotect to get work done, and so killing off that model is a big deal in advancing my own plan.
We rolled up Doctor the HVT, Hack an enemy unit at WIP -3, Hack the HVT at WIP -3, and repair an STR point with an Engineer.
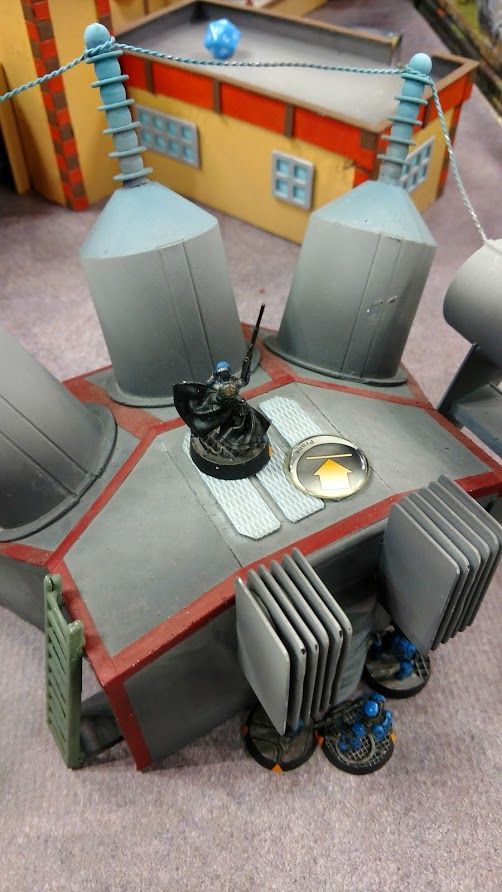
A view of my DZ, with most of my focus clustered around my HVT in the fairly open stone hills on the left side of the table. That REM is on the rooftop to hopefully bait a shot at it, or (if necessary) leap to its doom so I can repair it:
Going first in this one, I had a Naga scan the HVT, and then pair with the other Naga to zap a few Holoechoes until they identified the Kanren KHD and killed it. I was very worried about how massed my opponent was on my left hand side though, where he had the Hsien + Agent Haris, the Sophotect, a TR Rem, a Sensorbot... A great toolkit for breaking into my lines and scoring Classifieds.
A good view of my HVT and the fairly long stoney corridors where most of the gunfighting took place:
I didn't want to line any troops up across from that Hsien, so I hid most of my troops. He went in and dug out my left-side Naga, clearing the path for his Sophotect to sprint up the table. He Doctored the HVT, but had misjudged the distance, so wasn't able to retreat the Sophotect all the way back to his HVT. I pounced on this, advancing the Regular team up to flank the Sophotect hard and take it out of the game. This was big, since he hadn't repaired a STR yet. I then tag teamed the Akalis and the Regulars to take down entire Haris, flanking and doing Combi Rifle work, willing to take Nanopulser hits in exchange for unopposed BS18 shots at the Hsien to take it down. I was counting on the Akalis to Data Scan anyone left Unconscious, but his attempt to flank the last agent resulted in a Crit to the face.
Things were getting tense. I had scanned HVT and scored my own Classified. He had scanned the HVT, Doctored the HVT, and scored his personal Classified.
In my last turn, I jumped a Fugazi off a building and repaired it to tie up the game. I then ran the Doctor's Palbot waaaaay up thet able (about 5 Orders worth of 6-4 running) to reach the Unconscious Akalis. The fact that he didn't follow up to kill it completely was fortunate for me. The Trauma Doc patched up the Akalis, who still had 5 Orders to attempt scanning an Unconscious body. He nailed it third try, clinching the game and first place for me.
Sweet! With success on Thursday, pressure was basically off for the rest of the event. I could say that I came to GenCon, won an event, and the rest was just to enjoy new opponents and fun matches.
Debrief
I ended up with 3 Majors and 1 Minor, which was good enough for first overall!
On the whole, I was very pleased. My units did exactly what I expected of them, on the whole. The Regulars remain one of my favorite link teams of all time, performing an amazing trifecta of Order generation, area denial and support via Sensor. The lone Bagh Mari also really shone, providing just enough gunfighting dominance to knock down pesky link teams or make heavy threats pause. The Pile o' REMs is one of my favorite elements of listbuilding NCA and Acon, and they did just fine by watching table edges.
The real stars here of course were the Nagas. In each game, they played a critical role.
I usually don't run my lists with quite so many Orders, but honestly the points-intensive units in Acon just didn't feel like they had a role here. The Guarda is fine, but not that much better than a Naga doing work with Combi and Mines, or a Regular Spitfire doing work at BS15. Smoke is obviously great, but with the Bagh Mari and Regular Sniper, I found I didn't have to hide too often.
The Akalis were fine, but for a unit that's putting all its points into simply having +1 BS over most AD troopers, they always feel a little disappointing. +1 BS doesn't help you against a lucky crit, or avoiding templates, or most of the other threats that an AD trooper typically faces.... Whereas having a flamethrower, Mines, close combat ability, or any other element you see on star AD troopers sure is interesting. Still, I liked having Akalis in my lists.
Friday Tournament
For Friday, it was NeoTerra time. Lineup: Capture and Protect, Rescue, Cold Sleep, Seize the Antennae. Now, a smart person would probably avoid NeoTerra for these missions, and maybe even avoid PanOceania altogether. However, I always enjoy trying to conform my favorite Sectorial to work in missions that are less-than-ideal. So with Thursday under my belt, I figured I would make the attempt.
![]() Neoterran Capitaline Army
──────────────────────────────────────────────────
Neoterran Capitaline Army
──────────────────────────────────────────────────
GROUP 110
![]() SWISS GUARD Hacker (Assault Hacking Device) MULTI Rifle / Pistol, AP CCW. (0.5 | 70)
SWISS GUARD Hacker (Assault Hacking Device) MULTI Rifle / Pistol, AP CCW. (0.5 | 70)
![]() DEVA (Multispectral Visor L2) Spitfire, Nanopulser / Pistol, Knife. (1 | 33)
DEVA (Multispectral Visor L2) Spitfire, Nanopulser / Pistol, Knife. (1 | 33)
![]() HEXA Hacker (Killer Hacking Device) Combi Rifle / Pistol, Electric Pulse. (0 | 27)
HEXA Hacker (Killer Hacking Device) Combi Rifle / Pistol, Electric Pulse. (0 | 27)
![]() FUSILIER HMG / Pistol, Knife. (1 | 18)
FUSILIER HMG / Pistol, Knife. (1 | 18)
![]() FUSILIER Missile Launcher / Pistol, Knife. (1.5 | 15)
FUSILIER Missile Launcher / Pistol, Knife. (1.5 | 15)
![]() FUSILIER (Forward Observer, Deployable Repeater) Combi Rifle / Pistol, Knife. (0 | 12)
FUSILIER (Forward Observer, Deployable Repeater) Combi Rifle / Pistol, Knife. (0 | 12)
![]() FUSILIER Combi Rifle / Pistol, Knife. (0 | 10)
FUSILIER Combi Rifle / Pistol, Knife. (0 | 10)
![]() FUSILIER Lieutenant Combi Rifle / Pistol, Knife. (0 | 10)
FUSILIER Lieutenant Combi Rifle / Pistol, Knife. (0 | 10)
![]() MULEBOT (Minesweeper, Repeater) Electric Pulse. (0 | 8)
MULEBOT (Minesweeper, Repeater) Electric Pulse. (0 | 8)
![]() MULEBOT (Minesweeper, Repeater) Electric Pulse. (0 | 8)
MULEBOT (Minesweeper, Repeater) Electric Pulse. (0 | 8)
GROUP 26
![]() HEXA MULTI Sniper Rifle / Pistol, Electric Pulse. (1.5 | 32)
HEXA MULTI Sniper Rifle / Pistol, Electric Pulse. (1.5 | 32)
![]() PATHFINDER DRONBOT Combi Rifle, Sniffer / Electric Pulse. (0 | 16)
PATHFINDER DRONBOT Combi Rifle, Sniffer / Electric Pulse. (0 | 16)
![]() FUGAZI DRONBOT Flash Pulse, Sniffer / Electric Pulse. (0 | 8)
FUGAZI DRONBOT Flash Pulse, Sniffer / Electric Pulse. (0 | 8)
![]() FUGAZI DRONBOT Flash Pulse, Sniffer / Electric Pulse. (0 | 8)
FUGAZI DRONBOT Flash Pulse, Sniffer / Electric Pulse. (0 | 8)
![]() FUGAZI DRONBOT Flash Pulse, Sniffer / Electric Pulse. (0 | 8)
FUGAZI DRONBOT Flash Pulse, Sniffer / Electric Pulse. (0 | 8)
![]() TRAUMA-DOC Combi Rifle / Pistol, Knife. (0 | 14)
TRAUMA-DOC Combi Rifle / Pistol, Knife. (0 | 14)
![]() PALBOT Electric Pulse. (0 | 3)
PALBOT Electric Pulse. (0 | 3)
5.5 SWC | 300 Points
![]() Neoterran Capitaline Army
──────────────────────────────────────────────────
Neoterran Capitaline Army
──────────────────────────────────────────────────
GROUP 110
![]() SWISS GUARD Missile Launcher, Light Shotgun / Pistol, AP CCW. (2 | 69)
SWISS GUARD Missile Launcher, Light Shotgun / Pistol, AP CCW. (2 | 69)
![]() LOCUST (Marksmanship L1) Marksman Rifle / Pistol, Shock CCW, Knife. (0 | 33)
LOCUST (Marksmanship L1) Marksman Rifle / Pistol, Shock CCW, Knife. (0 | 33)
![]() HEXA Hacker (Killer Hacking Device) Combi Rifle / Pistol, Electric Pulse. (0 | 27)
HEXA Hacker (Killer Hacking Device) Combi Rifle / Pistol, Electric Pulse. (0 | 27)
![]() FUSILIER HMG / Pistol, Knife. (1 | 18)
FUSILIER HMG / Pistol, Knife. (1 | 18)
![]() FUSILIER Missile Launcher / Pistol, Knife. (1.5 | 15)
FUSILIER Missile Launcher / Pistol, Knife. (1.5 | 15)
![]() FUSILIER (Forward Observer, Deployable Repeater) Combi Rifle / Pistol, Knife. (0 | 12)
FUSILIER (Forward Observer, Deployable Repeater) Combi Rifle / Pistol, Knife. (0 | 12)
![]() FUSILIER Combi Rifle / Pistol, Knife. (0 | 10)
FUSILIER Combi Rifle / Pistol, Knife. (0 | 10)
![]() FUSILIER Lieutenant Combi Rifle / Pistol, Knife. (0 | 10)
FUSILIER Lieutenant Combi Rifle / Pistol, Knife. (0 | 10)
![]() MULEBOT (Minesweeper, Repeater) Electric Pulse. (0 | 8)
MULEBOT (Minesweeper, Repeater) Electric Pulse. (0 | 8)
![]() MULEBOT (Minesweeper, Repeater) Electric Pulse. (0 | 8)
MULEBOT (Minesweeper, Repeater) Electric Pulse. (0 | 8)
GROUP 26
![]() HEXA MULTI Sniper Rifle / Pistol, Electric Pulse. (1.5 | 32)
HEXA MULTI Sniper Rifle / Pistol, Electric Pulse. (1.5 | 32)
![]() PATHFINDER DRONBOT Combi Rifle, Sniffer / Electric Pulse. (0 | 16)
PATHFINDER DRONBOT Combi Rifle, Sniffer / Electric Pulse. (0 | 16)
![]() FUGAZI DRONBOT Flash Pulse, Sniffer / Electric Pulse. (0 | 8)
FUGAZI DRONBOT Flash Pulse, Sniffer / Electric Pulse. (0 | 8)
![]() FUGAZI DRONBOT Flash Pulse, Sniffer / Electric Pulse. (0 | 8)
FUGAZI DRONBOT Flash Pulse, Sniffer / Electric Pulse. (0 | 8)
![]() FUGAZI DRONBOT Flash Pulse, Sniffer / Electric Pulse. (0 | 8)
FUGAZI DRONBOT Flash Pulse, Sniffer / Electric Pulse. (0 | 8)
![]() TRAUMA-DOC Combi Rifle / Pistol, Knife. (0 | 14)
TRAUMA-DOC Combi Rifle / Pistol, Knife. (0 | 14)
![]() PALBOT Electric Pulse. (0 | 3)
PALBOT Electric Pulse. (0 | 3)
6 SWC | 299 Points
Game 1: Seize the Antennae versus Bakunin
Round 1 was against a guy I see every week, and play on a regular basis. He was also in the Invitational. Bakunin is no joke, but I knew I'd have an edge with all my TO Camo. Having played on this table the previous day as well, I knew how dominant the right side building was as a boulevard for advancing into the midfield and wreaking havoc.
Basically, that's exactly what I did. Mirroring my deployment from the previous day, I put a Hexa sniper where the Regular Sniper was to help lock the table, then hustled the MSV2 Deva up the table. She managed to bag Pi Well, then Zoe, then a Zero hanging out on the center line. My Burst 5 Fusilier HMG went down to a lowly moderator sniper ARO, but the Hexa Sniper finished the job by picking off both Moderator Snipers. It was a strong opening turn.
Does this vantage point look familiar? The Hexa Sniper doing work:

The Deva's finishing point at the end of Round 1, with an Unconscious Zoe visible on the left:

Bakunin countered by healing up Zoe (I couldn't finish her due to her dropping out of LoF when she became Unconscious) and then shuffling the Haris into the midfield to poise for a rush in later turns. He set up a very tenacious defense of his near point, using Koalas and a number of Morlocks. Not an ultra-aggressive turn, but definitely a turn to stop me overrunning him.
The Deva eventually went down to a Pistol ARO from Kusanagi, but I actually now had an ultra long-range missile shot into a packed pile of bodies that blew up the Custodier, the Healer and a Morlock and basically put the nail in coffin for my opponent.
Here's the angle on that missile shot that sealed the game, with that purple token in the distance representing the Bakunin troops:
I had my close and center consoles comfortably locked down, and while I wasn't able to break into his DZ with the number of bodies that were still lurking back there, I did score a nice win to start Friday.
Game 2: Capture and Protect versus Vanilla PanO.
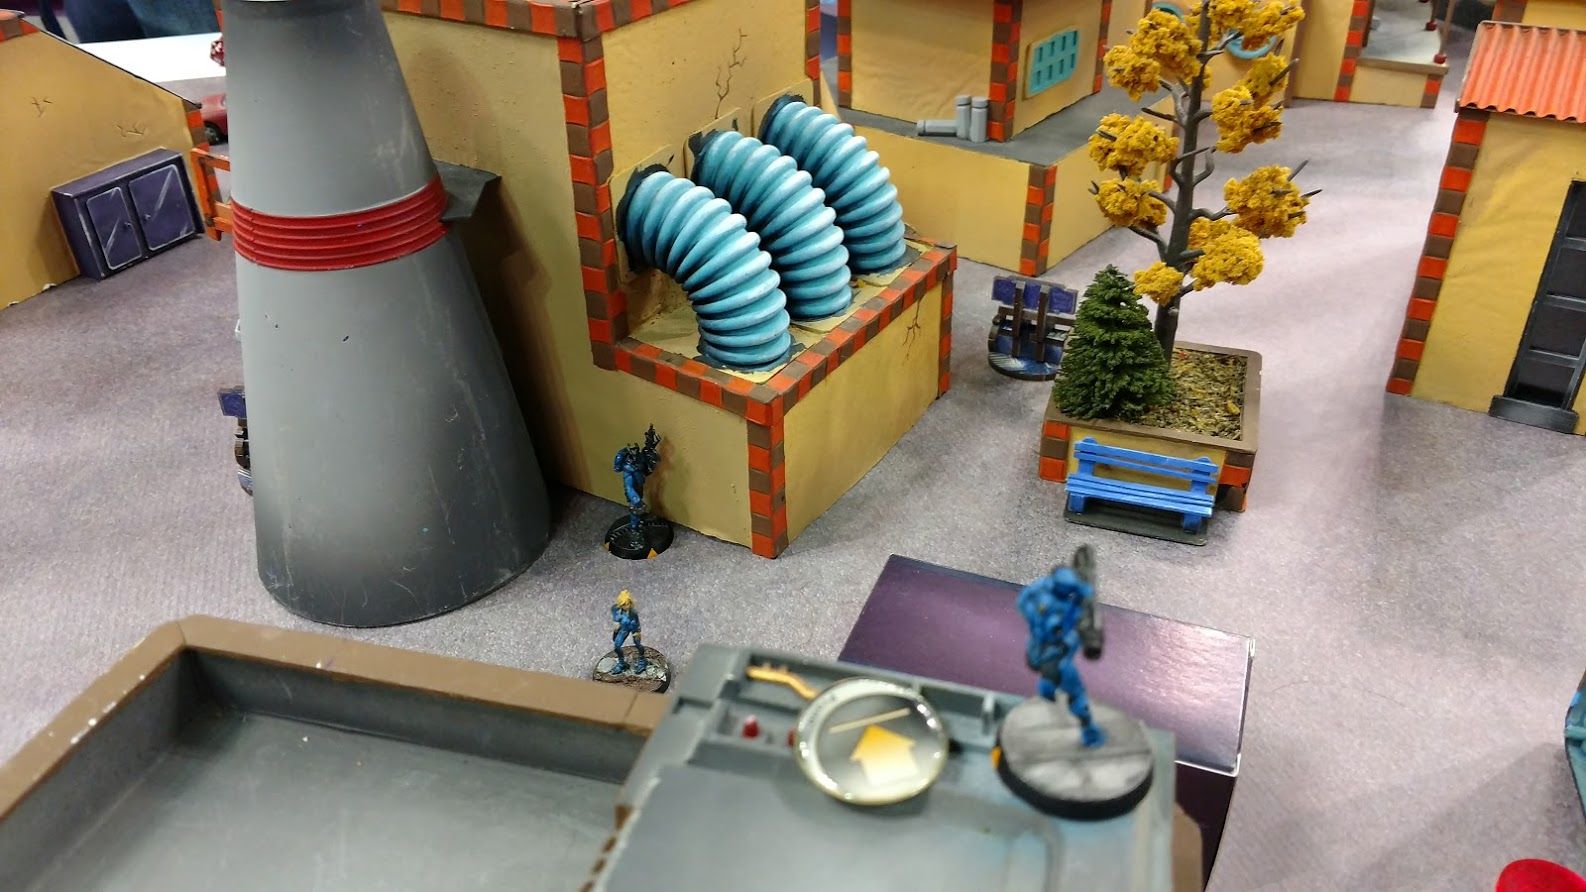
I also remembered this table from Thursday, especially the ultra-open lanes. This was a matchup where I was very, very glad to have brought NeoTerra. My opponent had plenty of gunfighting though, especially when he set up a Nisse Sniper basically touching the back table edge, hiding in trees, so that he had low visibility and saturation in his favor. That lone model became an almost impossible obstacle, and I was actually in a bind about how to attack it.
Thankfully, I was able to pull it out of that position:
Turn 1, my Hexa KHD revealed and ran to activate my console. A good start. I then had an opportunity to move-move him across a big gap and get into my opponents backline, giving me midfield shots into the back of a number of units that were poised to give me a hard time. I nearly pulled it off, except that a lurking Warcor managed to discover on a 4 (yes, rolling a 2) and revealing the Hexa right in the open, letting that Nisse follow up and blow my Hexa away. I rarely take those kinds of risks, but the lanes were so open that I was looking for any opportunity to crack my opponent's defense.
Thankfully I had some defense tricks of my own. My opponent started by letting his Krakots zerg up the table, hoping to murder my Locust and get some templates into my backline. The Hexa revealed and cooly picked one of them off. When my opponent started using Joan's trickery to make mass coordinated orders, both the Hexa and Swiss just started going to work against targets in the open. Joan lost two wounds instantly and spend the rest of the game hiding behind a car. My opponent then had to create a backup plan to dislodge the Swiss, who could see all three objectives from a vantage point on a rooftop and had them very well locked down.
Look familiar again? Hexa Sniper holding the fort and outshooting the Nisse:
A hell of a backstop. The Swiss Missile overwatching my Locust:
The Tueton got within 24 and started slinging shots, but the Swiss contested them all wonderfully, passing a couple of Armor Saves. I fed her a Command Token or two to keep her head up, and eventually my opponent had to pull the Tueton back having failed to remove her. He figured he had better odds versus the Nisse, and removed the Nisse from the bushes of serious modifier death, hiking the Nisse for 4 Orders until he could see my Hexa. My Hexa was no slouch though, managing to beat the 2 dice v 1 dice f2f roll to burn down the Nisse with Double Action. That was a seriously fortunate ARO for me.
From here, the man of the match was actually my Locust. My opponent still had a banged-up Joan, a Tueton Spitfire, two Sierras and a few Suppressing linetroopers to stop me from reaching his beacon.
The Locust went to work on all of them, flanking the Tueton to Markmsan Rifle him down in a few Orders, before advancing to take out a Suppressing Machinist and a Sierra. This paved the way for my Turn 3, where my Swiss left her lofty vantage point, sprinted up the middle, and grabbed the beacon. Unable to Recamo, and without enough orders to run to safety, she actually ran over to a dead Sierra and went Unconscious behind its banged up shell, using it to block LOF from Joan's likely avenue of attack.
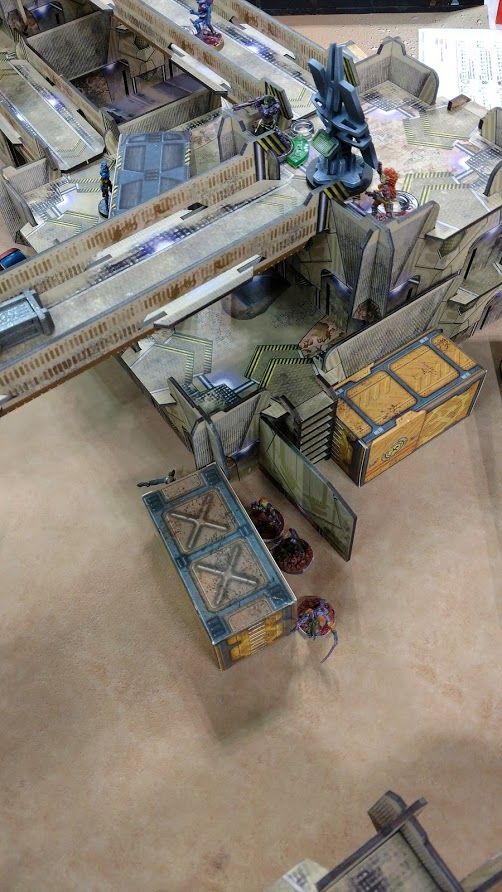
The endspot for my Swiss, prone in an alcove using the Sierra to block Line of Fire:
My opponent was able to get his console pushed with a Croc Hacker, who made a very valiant run to grab my beacon by running through a nasty overwatch of linked Fusilier HMG, Hexa Sniper, Pathfinder, and a couple of Fugazi who were all guarding my DZ. Had had to cross a lot of open ground, and I managed a Discover role that put him in the open just a little too far away from my beacon. He went for it anyway with a MOV-Dodge, going down in a hail of HMG and Double Action hits.
This game was very tense, with the strengths of PanO showcased on both sides. I considered myself lucky to win this one.
A great run by the Croc to grab that red beacon, but NCA had a big defense set up:
Game 3: Cold Sleep versus ALEPH
ALEPH was the one matchup I really didn't want, just because I feel like they do most things that PanO does but better, and with far more utility.
I did feel pretty comfortable here though. The big obstacle actually was the table. It had an objective room in the middle, and we were told to regard it as an objective room. With infinitely tall LoF, it cut my overwatch capability in half, severely limiting the effectiveness of both my Hexa Sniper and my Fusilier Missile.
Still, I was feeling pretty good. My opponent took side, so I (sadly) went first. Still, the Deva made the most of it by blitzing up the table, nuking two Netrods and two Thorakites, while my Pathfinder took out another Netrod to help thin my opponent's starting Order pool by 5. Nice. The Pathfinder even managed a couple button pushes.
My opponent came out swinging with his Myrmidon Officer, laying a chain of Zero-V Smoke that let her CC my Suppressing Deva straight into the dirt, then very nearly making it into my backline. I had to use Turn 2 dealing with her, scoring a couple of Combi crits against her that took her out of the action. From here I was feeling great... I had order pools intact, I just needed to take down a Posthuman Mk4 with heavy rocket launcher and I'd be able to sprint the Hexa fully up one table half to push two buttons and a center console as well.
Unfortunately, that Posthuman just didn't want to die. I fired linked missile shots from outside 32 inches. I fired Hexa MSR Surprise Shots from cover. The Posthuman just Dodged in place, staying alive for 7 Orders of me blazing away.
That Dodging streak was a big problem. With the Posthuman watching that corridor, I couldn't advance and push any buttons without eating his HRL AROs.
Instead I had to focus my button pushing on the other flank, where my opponent was stronger with Achilles, Scylla, and (what I figured) was a Posthuman Mk2 Sniper or AHD lurking.
The Swiss was good as always, and managed to get all of the aforementione resources to commit to taking him out, but Scylla proved too much. Catching him between lethal KHD attacks and heavy flamethrower shots, I had to pick from two very unenviable results. This meant my left side collapsed.
This wouldn't have been so bad since I had planned to simply own the right side, but since that Posthuman had held the fort, I finished down 2-4. Apparently I managed to neglect taking any photos of this one!
Game 4: Rescue versus Tohaa
Rescue? No sweat, I play Rescue a lot. With some of the pressure off from a competitive standpoint, it was time to just try and finish strong. I was up against Tohaa, obviously the masters of frustratingly durable AROs, cheap TO Camo Infiltrators, and Zero-V Smoke. All of these were nasty tools to face for Rescue.
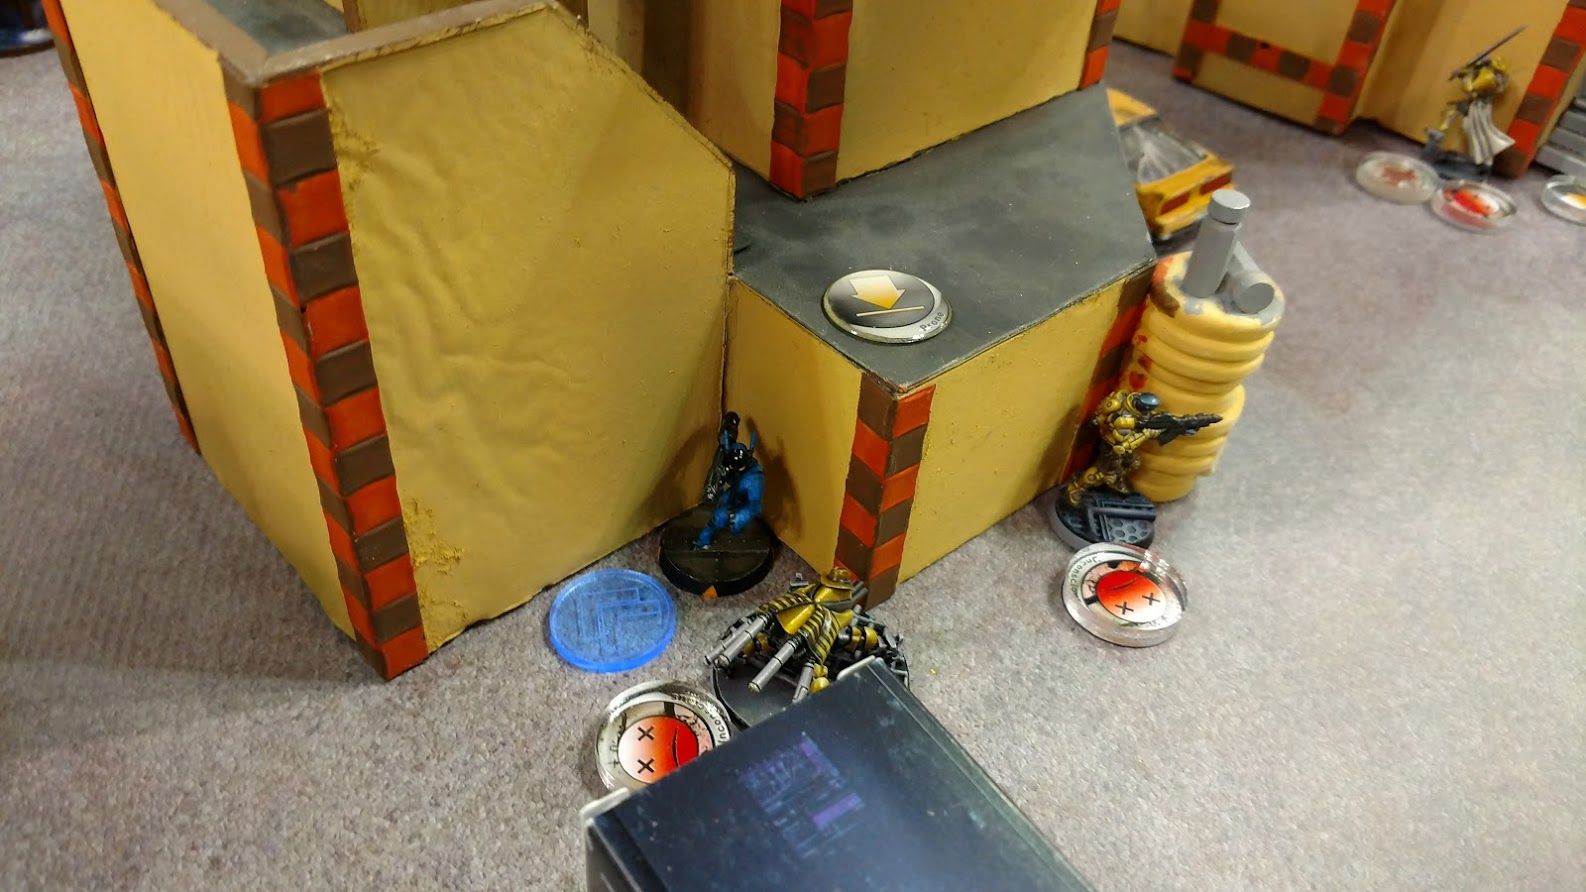
However, I did managed to sneak my Locust over the midline and Infiltratte on the flank of the standard boring gag-worth Gao Rael Sniper/Sukeul Missile symbiomate team. The Gao Rael casually crit my Fusilier HMG to death with my first Order, but the Locust held up his end with some Marksman Rifle fire that eventually forced both the Gao Rael and Sukeul to drop prone. With both of them pinned down, my Hexa Sniper did serious work, scaling walls and ladders to pick off one complete Triad and help lock down another before ducking to safety.
The Hidden Deployment location for my Hexa Sniper, next to one of the enemy Civvies. It may not look like much of a vantage point, but from here she could access three different levels and multiple ladders/catwalks to help get the best positions and react quickly to incoming threats:
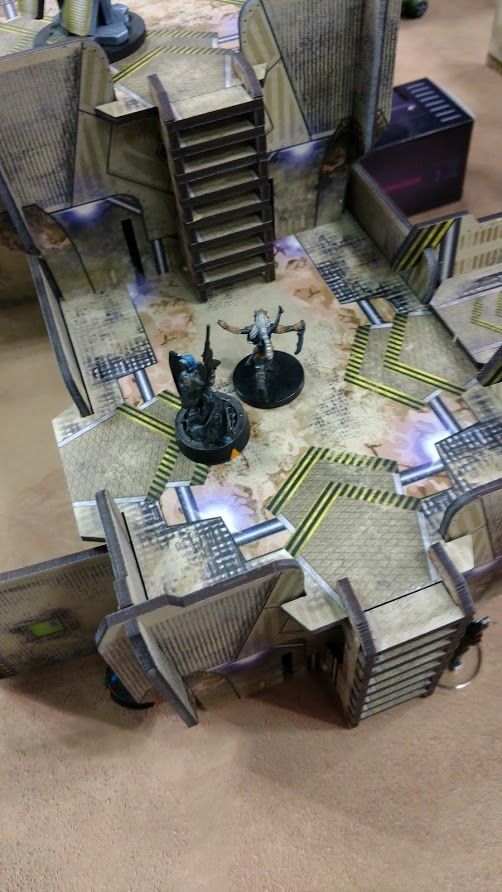
The Cookie Cutter Triad up top, doing it's thing supported by a Kaurii who didn't last long versus the Locust's Marksman Rifle.
My opponent wasn't done though, running a Triad straight up the table and into my DZ. Thankfully for me, he synched a civvie but then his Orders stalled out, leaving the Triad right up close. I sandwhiched them between what was left of my Fusilier link and the Hexa Sniper, managing to take the whole team out, and leaving me enough Orders for the Locust to synch a civvie and start the long hike back.
The Gao Rael and Sukuel started maneuvering to take down the Locust, and this is where my Swiss missile came into play... Blowing all all three link members with three separate AROs. We wrapped up from here, with NCA able to maximize points in quite a tough mission.
The Swiss covering my leftmost Civvies, keeping the artichoke tide at bay...
Debrief
Ahhh NCA. I really do enjoy trying to make you work in any format.
I walked away with 2 majors, 1 minor, and a loss. However, I had a flood of Objective Points, which ended up being good enough for third! Generally I was quite pleased here. The Swiss performed admirably as always. The Fusiliers did alright with their modest Order generation. I did have two games where the Fusilier HMG, in spite of favorable odds, simply got outshot by my opponent's ARO on Turn 1. However, the Hexas more than made up for it, as both the Hexa KHD and Hexa Sniper had solid performances here. I did miss having mines/Drop Bears to a degree, but the abundance of TO Camo helped me with defense and partially offset the lack of mines or Auxbot templates.
The game that went awry is certainly the one that's prompted the most critical thought. ALEPH is tough in many ways, since they take a lot of NCAs tricks (tech, supreme Heavy Infantry, inexspensive quality gunfighters) and build upon it dramatically with high WIP Specialists, Smoke, Close Combat, and other niceties. For that matchup, I lamented not having either the Swiss Missile, the Garuda or the Bulleteer Spitfire so that I could aggressively advance and do more to rip the guts out of my opponent's valuable troops. Despite the 4 or 5 Order swing my way on Turn 1, he still did a great job getting things done with his remaining units. I reckon that loss will stick with me a bit.
Overall though, I was pleased with the performance of both Sectorials. My staple units (despite some dice vagaries) did everything I asked of them. I was happy with my list composition and the options they afforded me. From here though, I may venture back towards a Vanilla faction so that I can start to maximize versatility again. Firepower is a wonderful thing, but in some of these matchups, I found myself envying the units of some of my Vanilla opponents.
I appreciate you taking the time to read about one PanO player's (mis)adventures at GenCon. I'll follow up with my experiences in the Warsenal Invitational soon.